Introduction: Deployer has an easy-to-use interface that allows users to keep track of completed and scheduled email campaigns through the campaign queue. This technical documentation will guide you through how to use the campaign queue feature in Deployer.
Accessing Campaign Queues: To access the Campaign Queues page, navigate to the left-hand menu in Deployer, go to Work Queues, and click on Campaign Queue. If you have trouble finding it, type Campaign Queue in the smart menu filter.
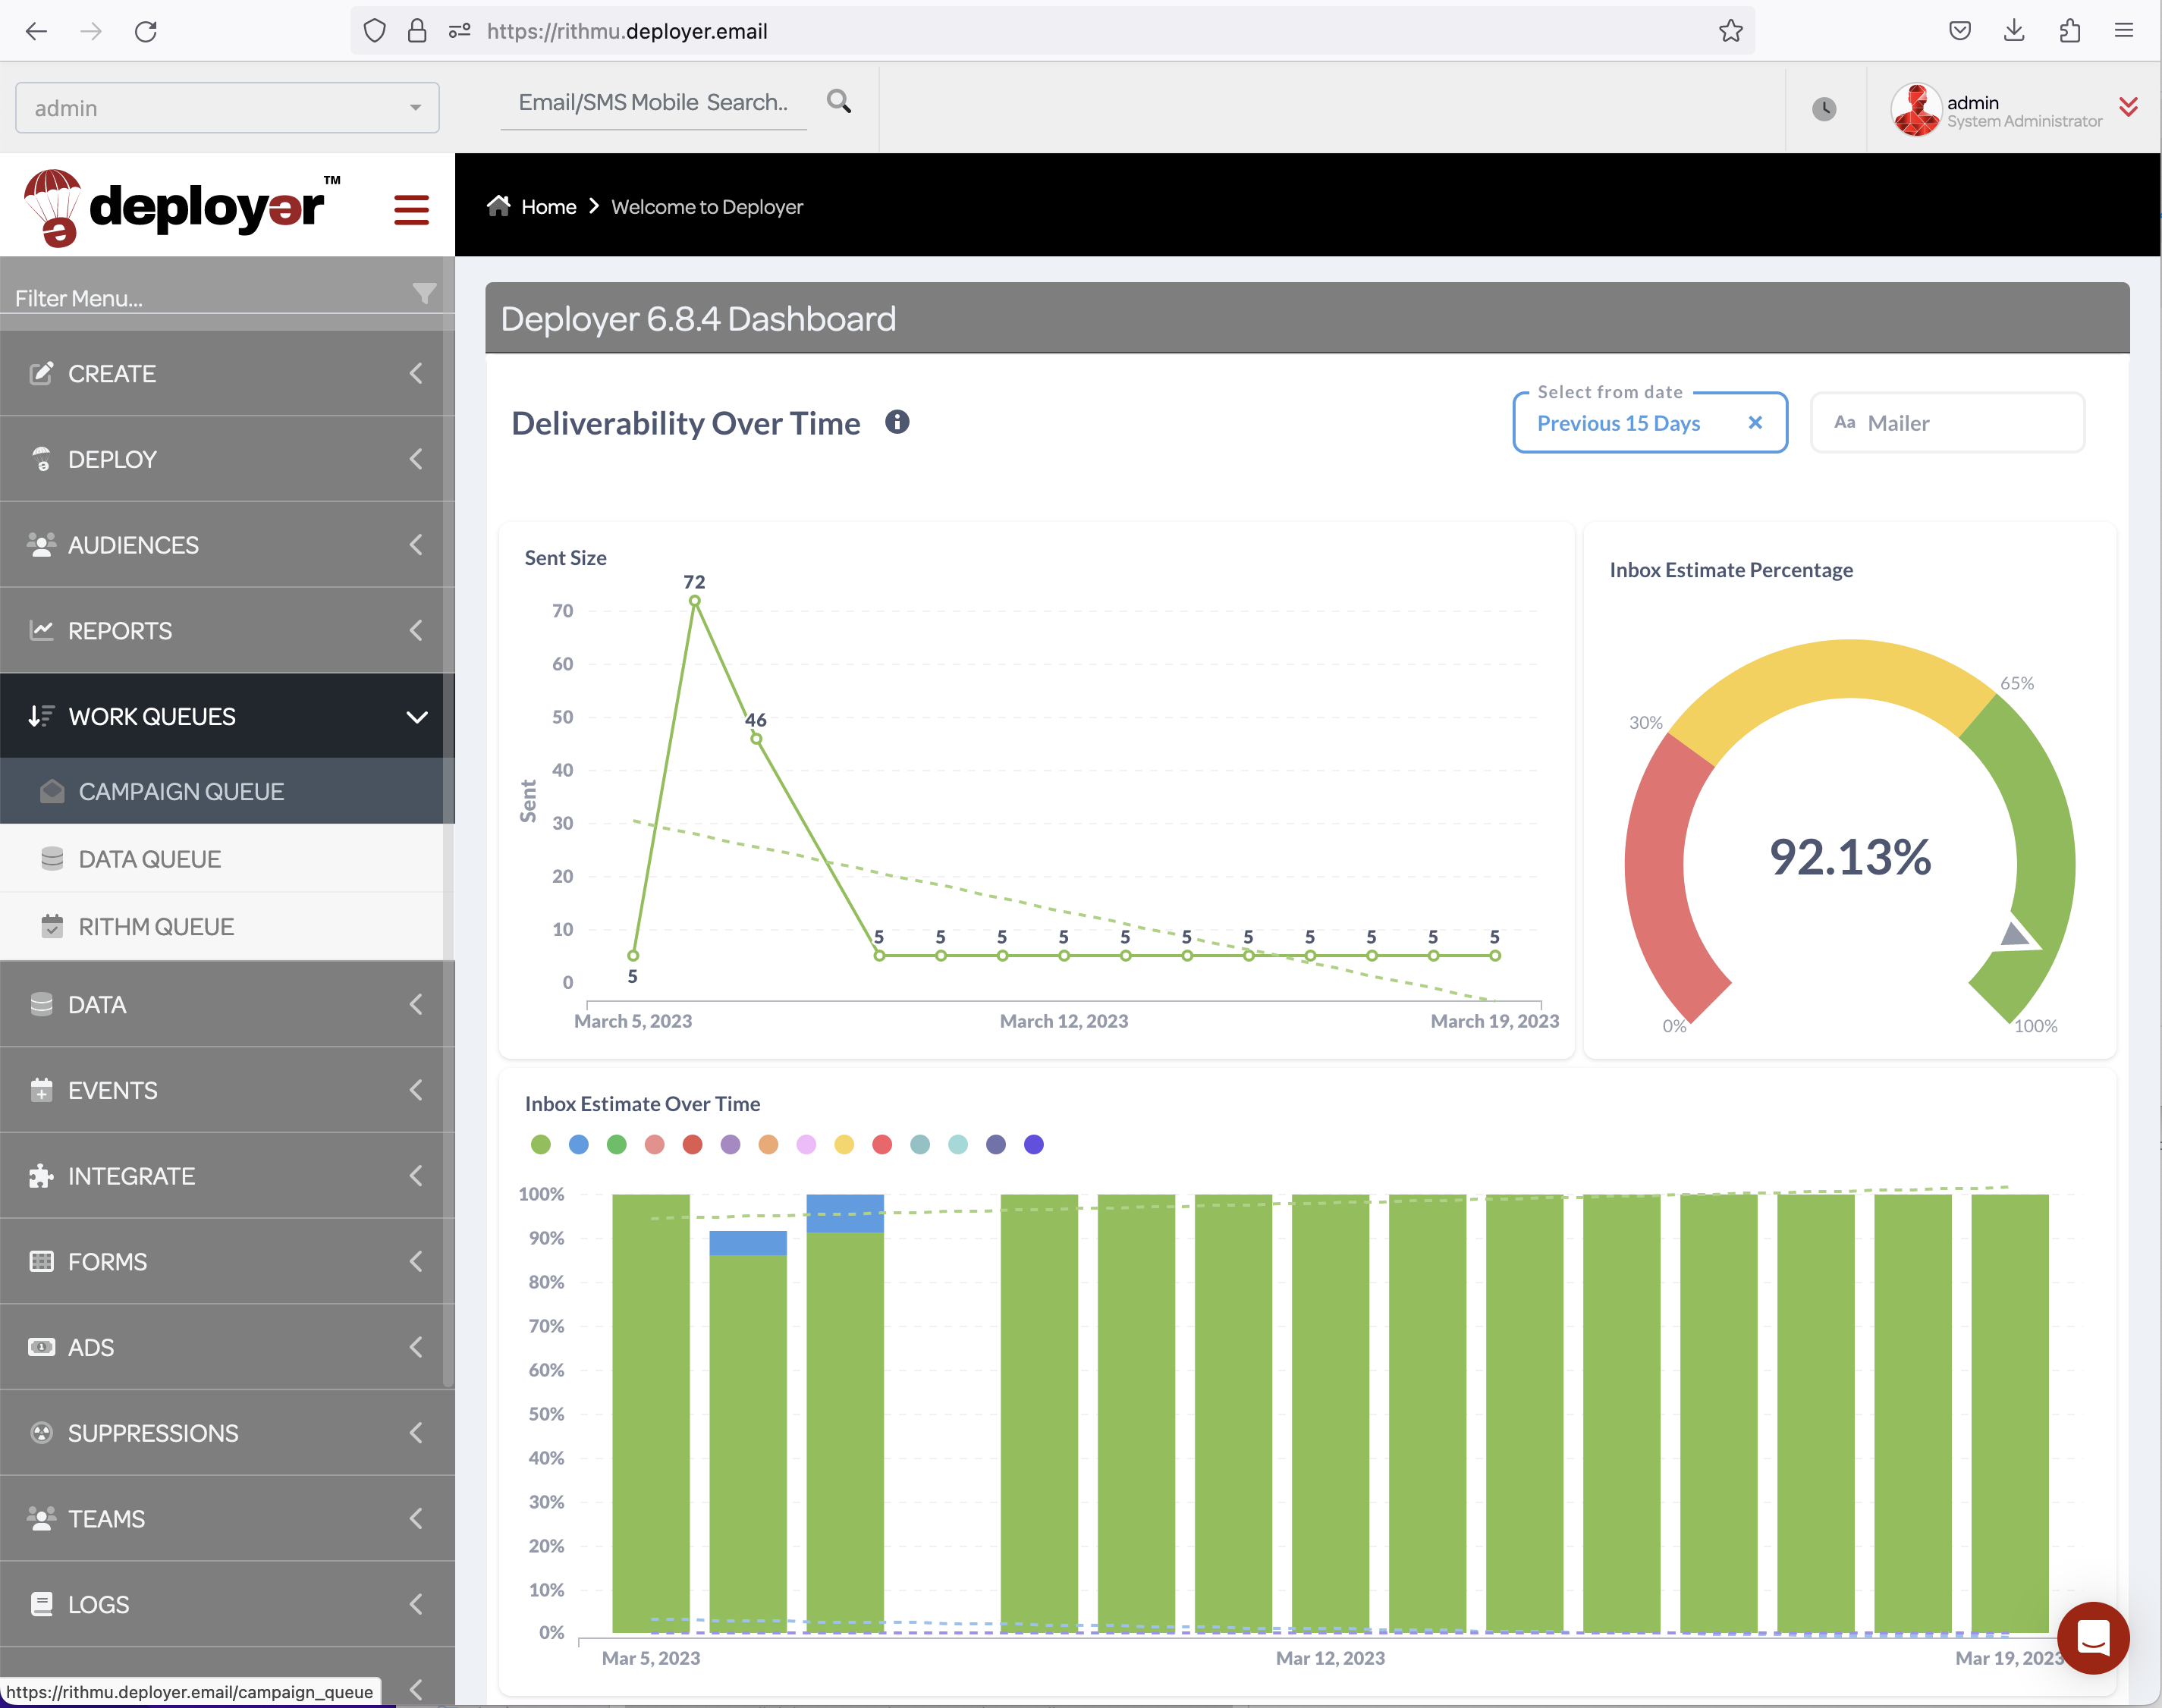
Campaign Queue Interface: The Campaign Queue page displays all past, present, or future campaigns scheduled in Deployer. Each row represents a segment that a campaign was, is, or will be deployed to.
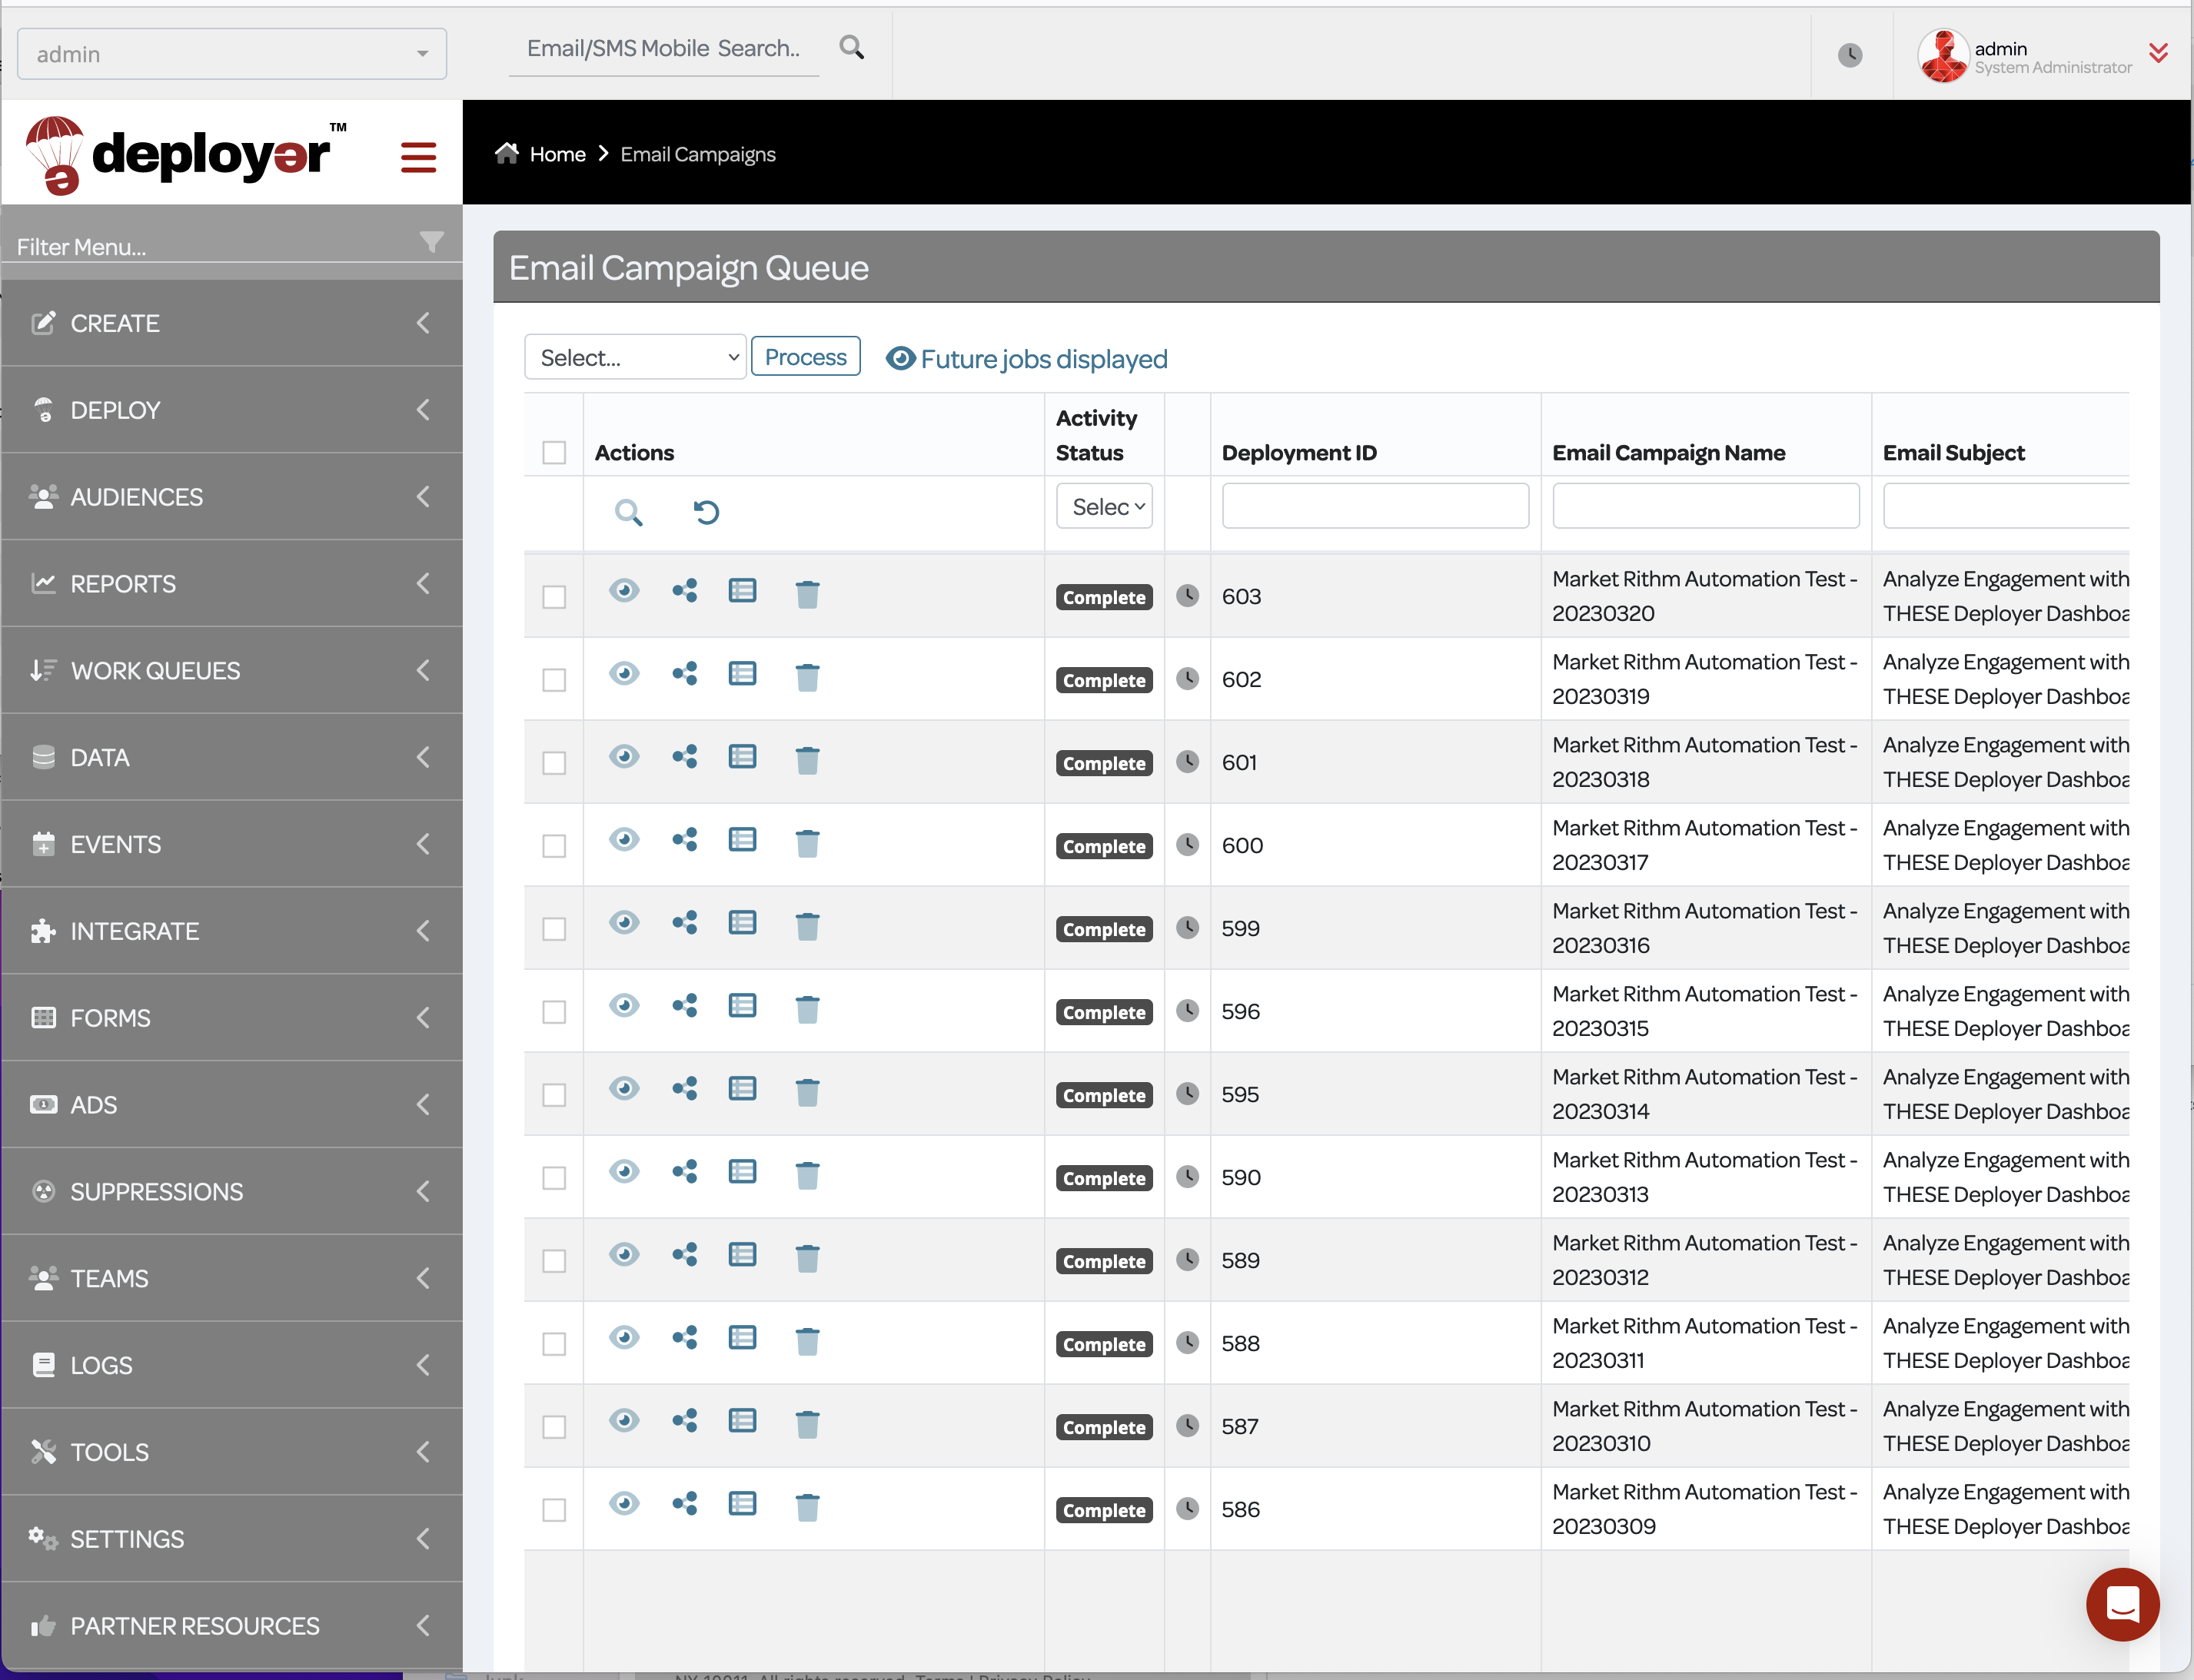
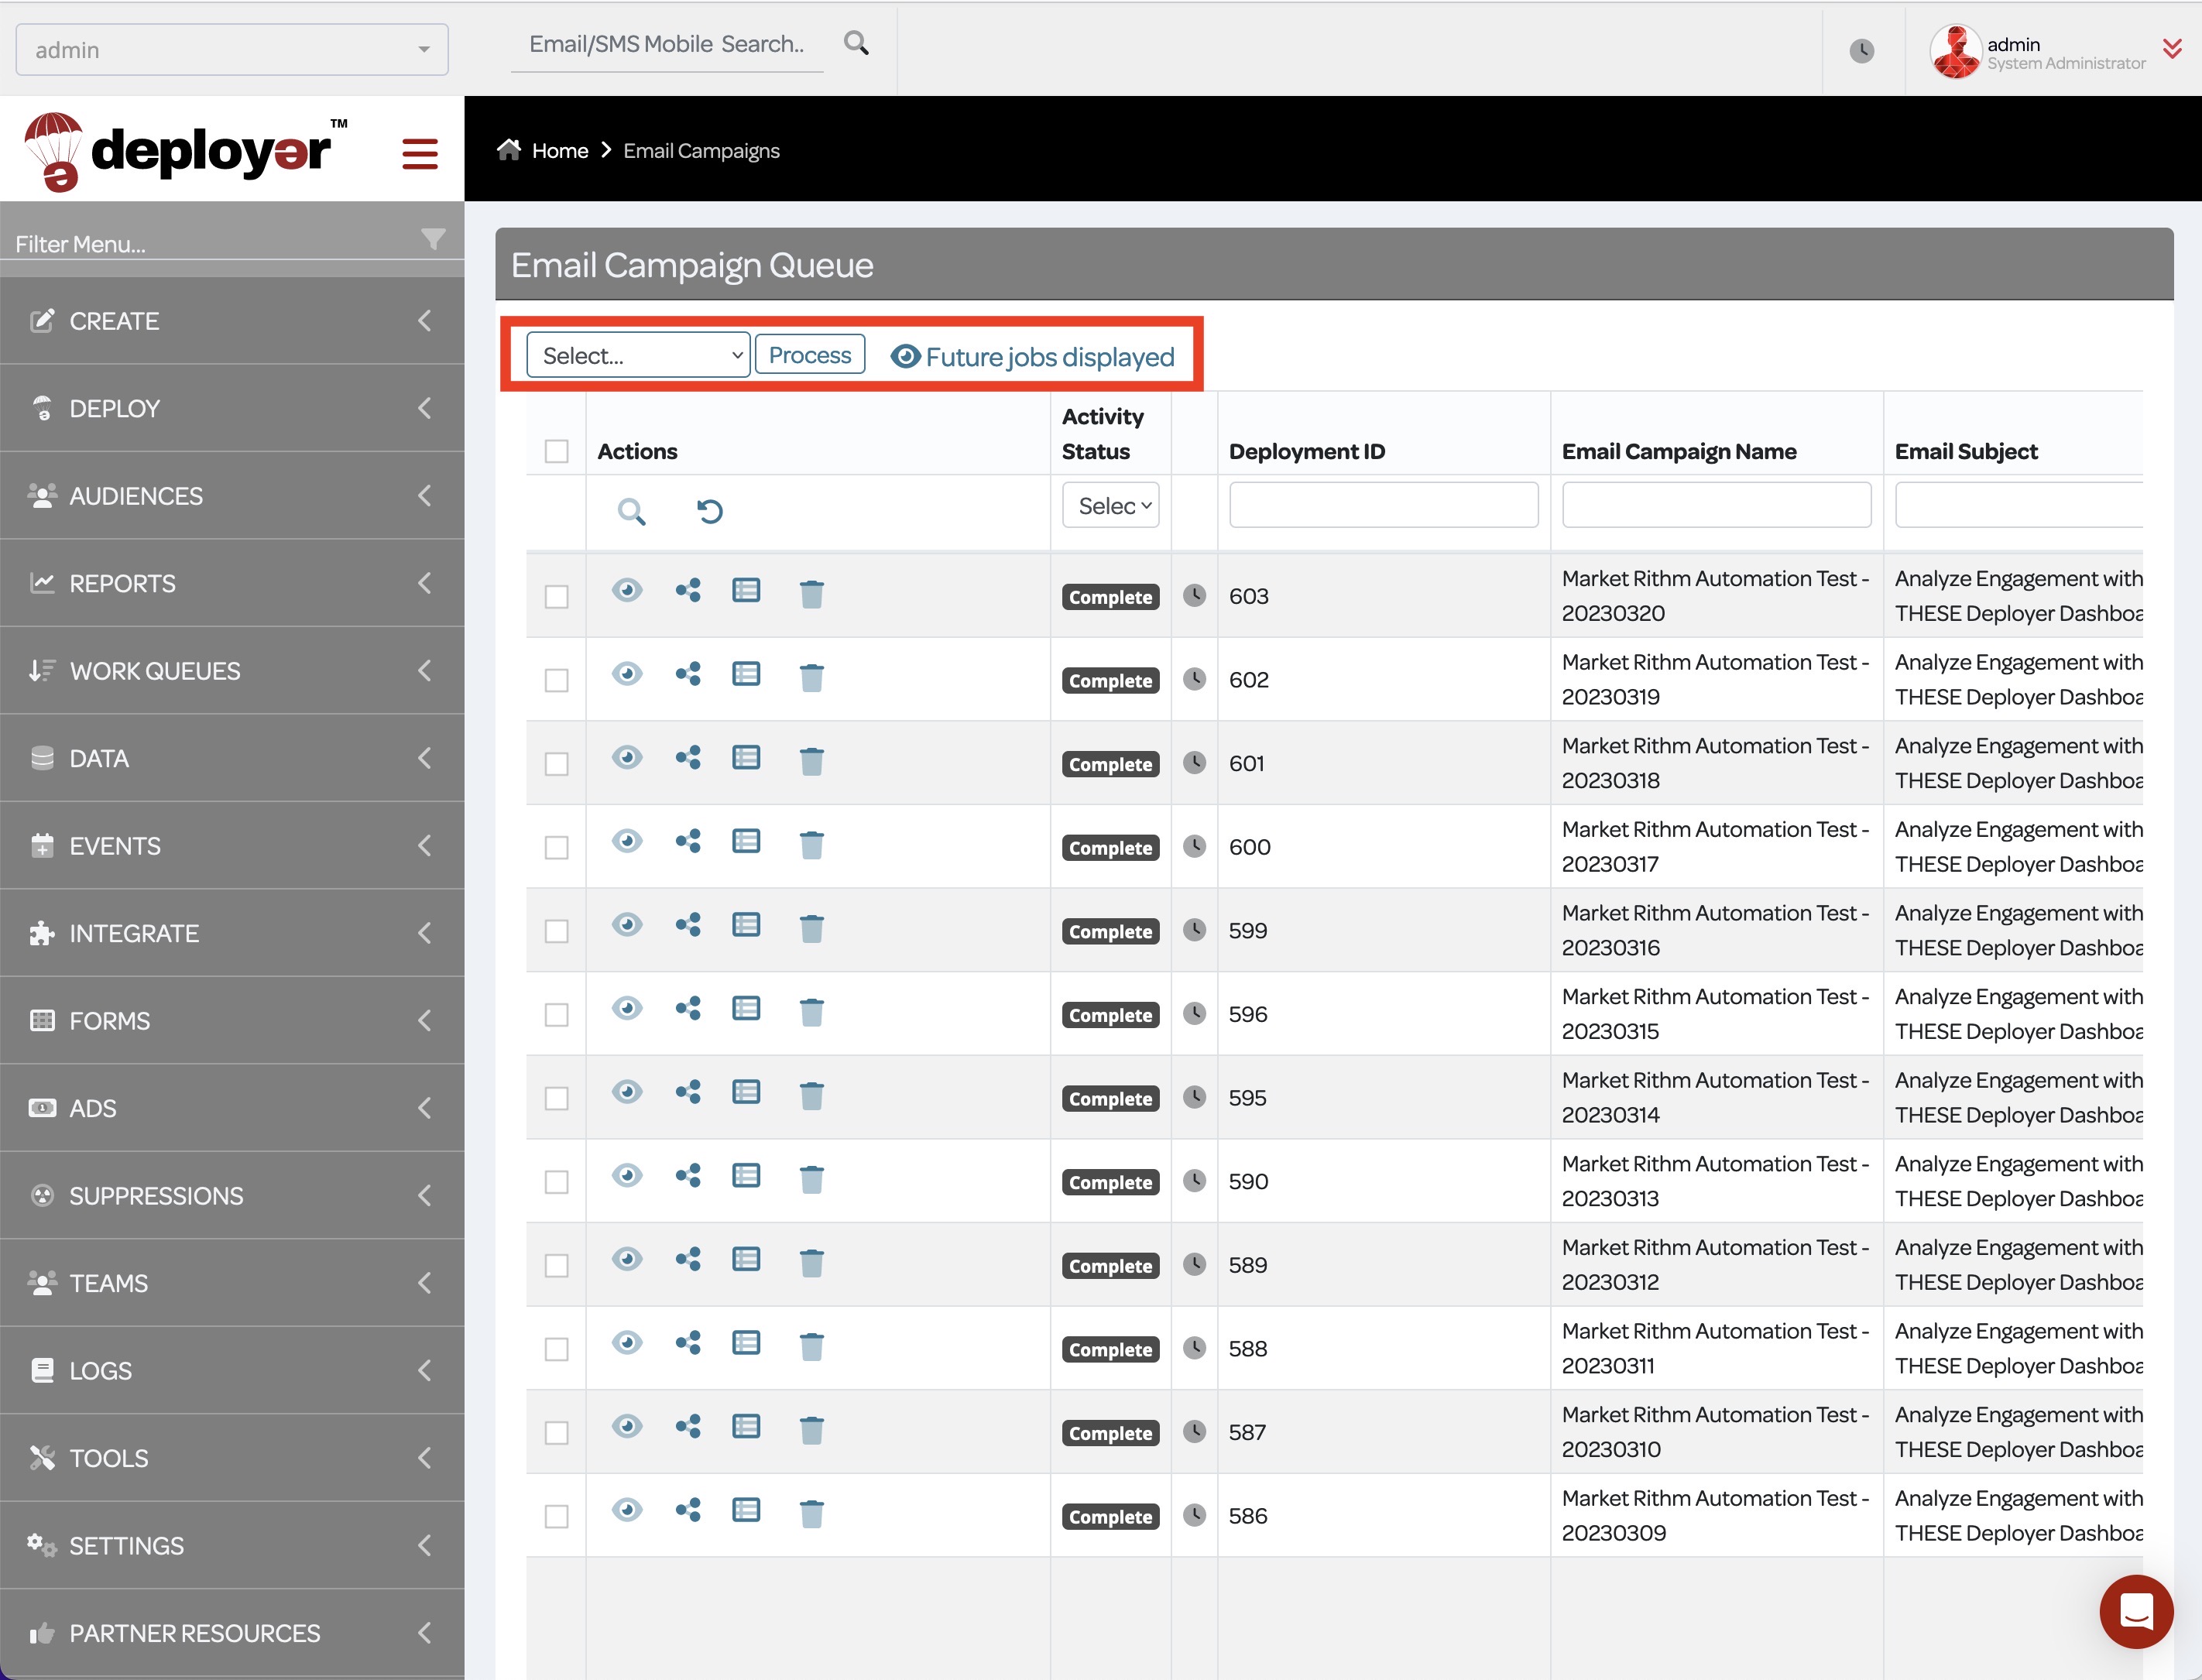
The “Email Campaign Queue” header displays a select box prompting users to select a command. To execute the selected command, click the blue process box. The eye icon allows users to view future scheduled jobs in the columns table. To hide future jobs, click the blue eye icon. You may want to do this if there is an abundance of scheduled emails and you only want to see current and past campaigns.
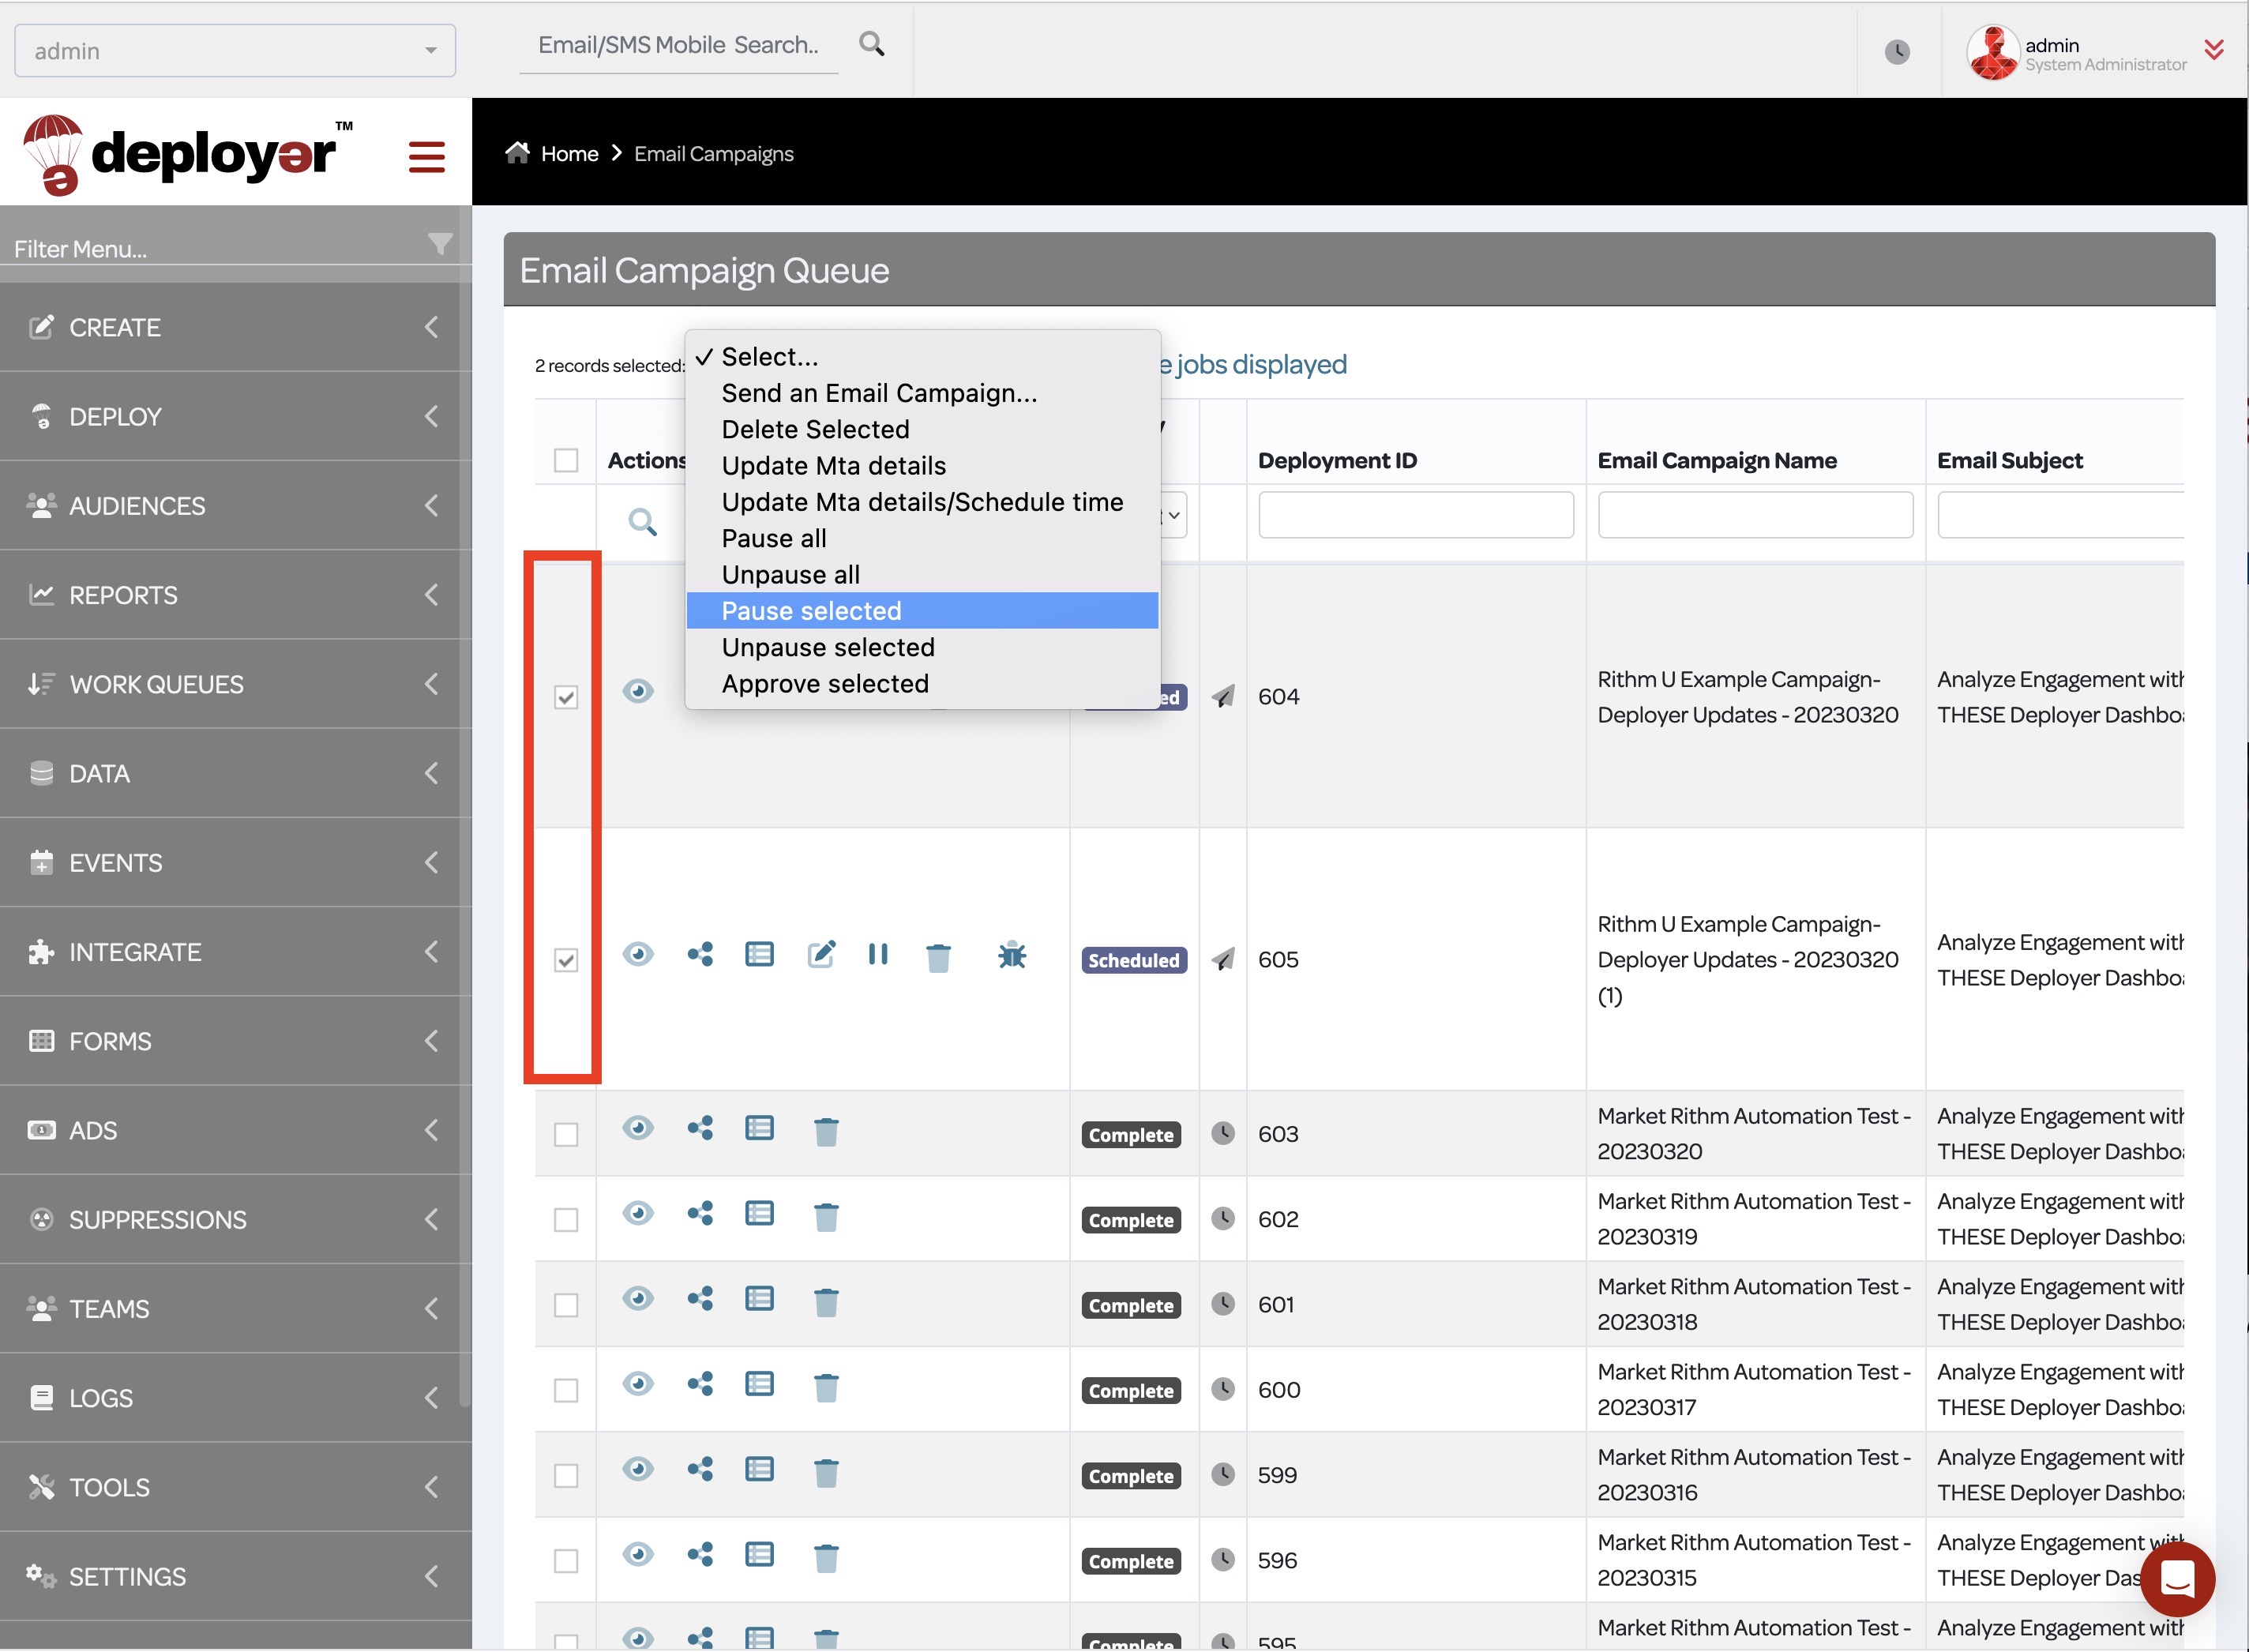
Pausing or Deleting Scheduled Campaigns: To pause one or more campaigns, check the boxes in the rows of the scheduled campaign. Return to the command box and select the Pause Selected or Delete Selected command then click process. Alternatively, click the pause or delete icon in each row.
Filtering Campaign Queues: The magnifying glass icon allows users to filter a particular campaign by typing in an identifier like a keyword or ID number in its corresponding category column. To revert back to the default status where all emails can be seen starting from the most recent, click the revert arrow icon.
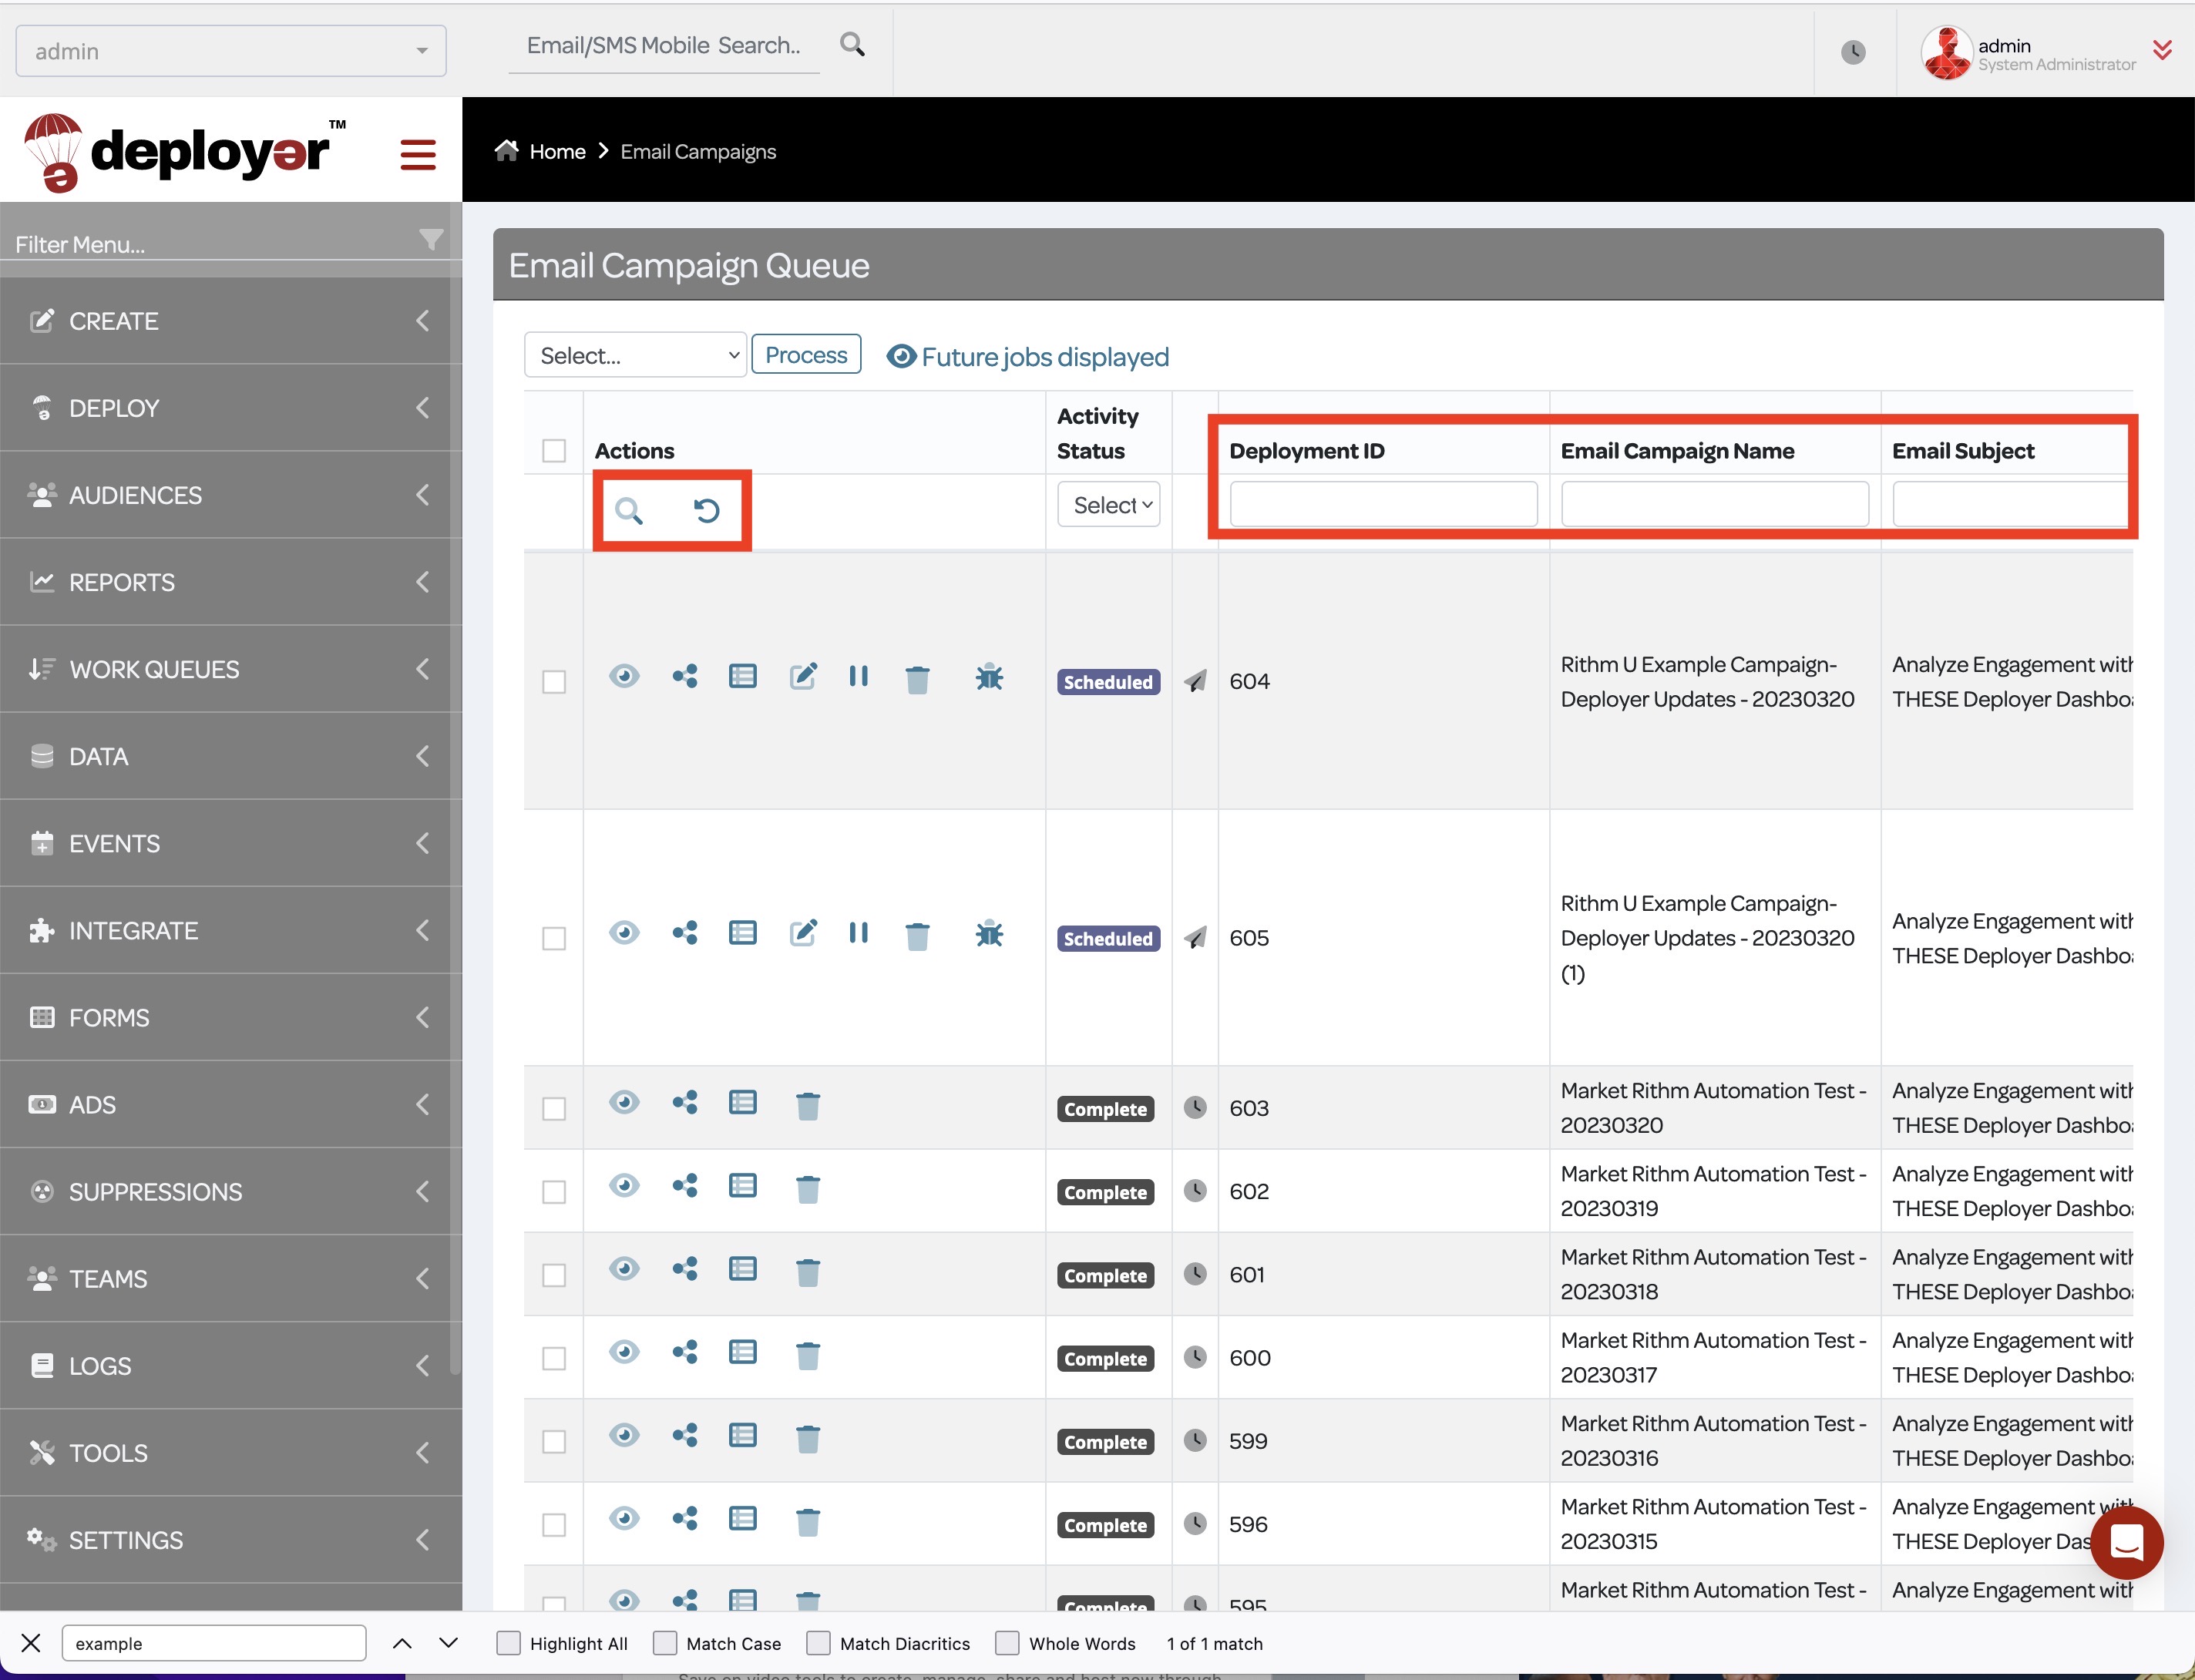
You can also filter campaigns by Deployment ID, Campaign Name, Subject Line, From Name, Campaign Code, or Audience segment.

Actions and Statuses: Under the Actions column are four icons: view creative, share creative, user log, and delete.
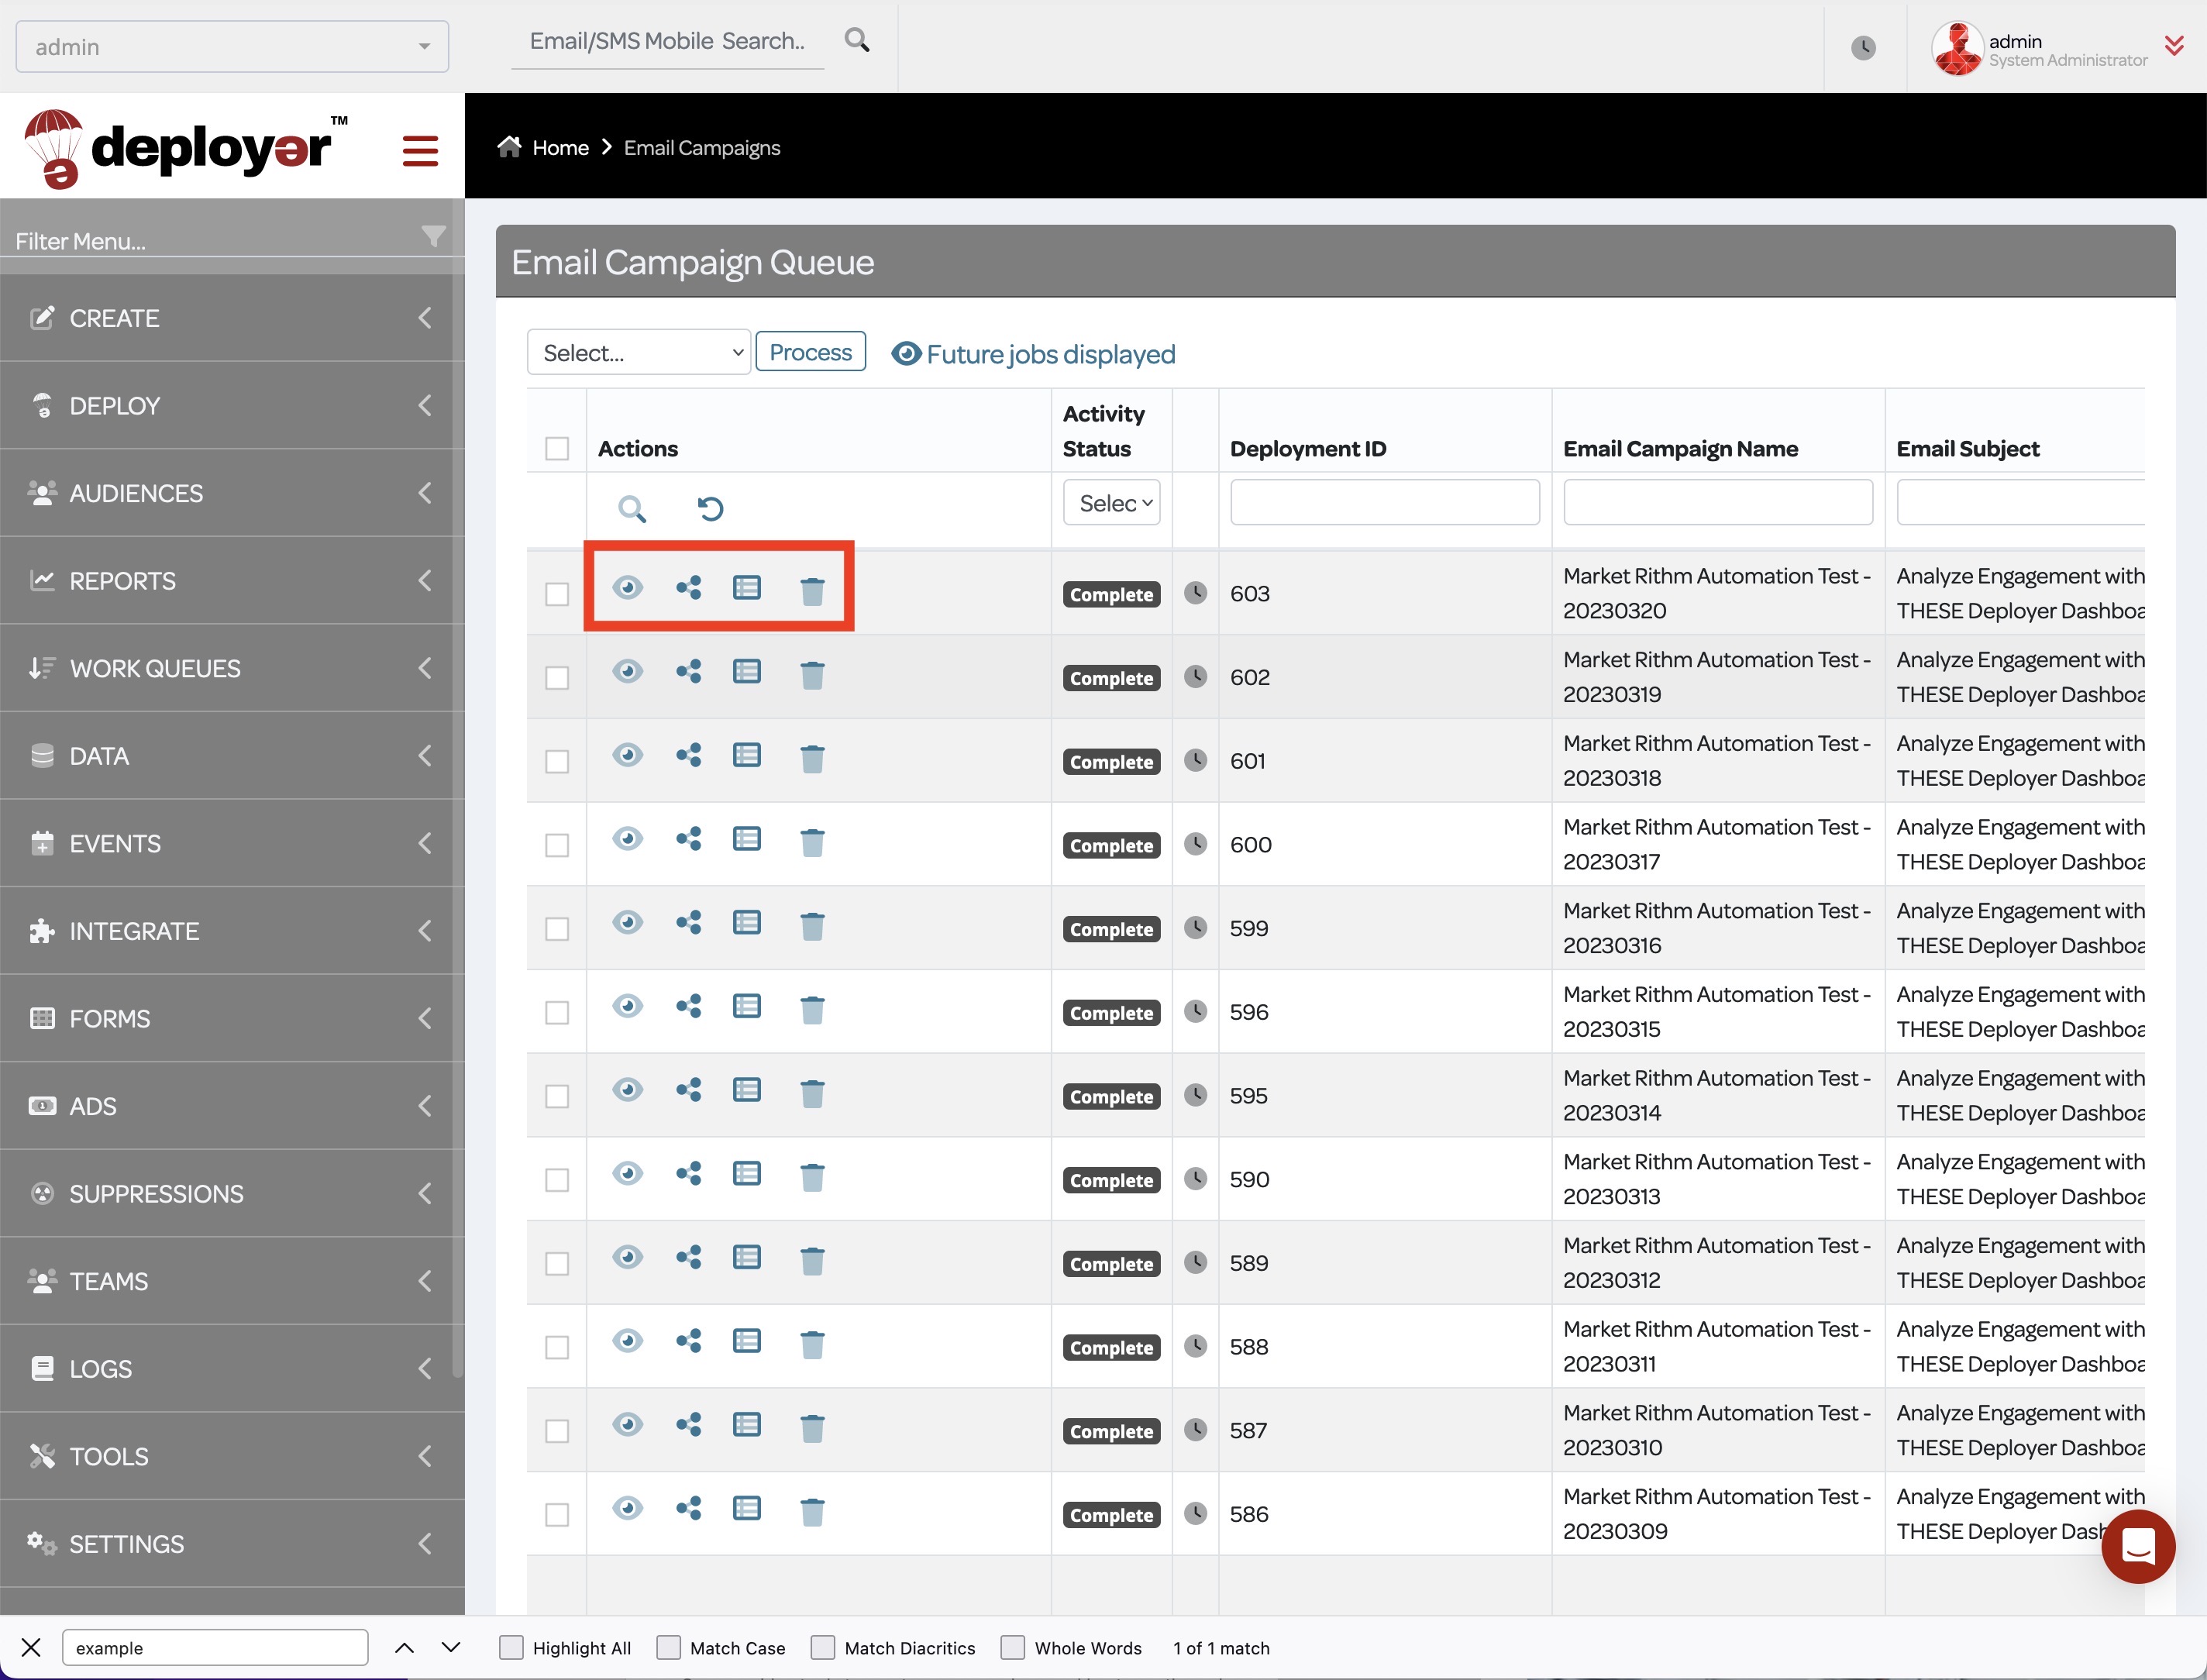
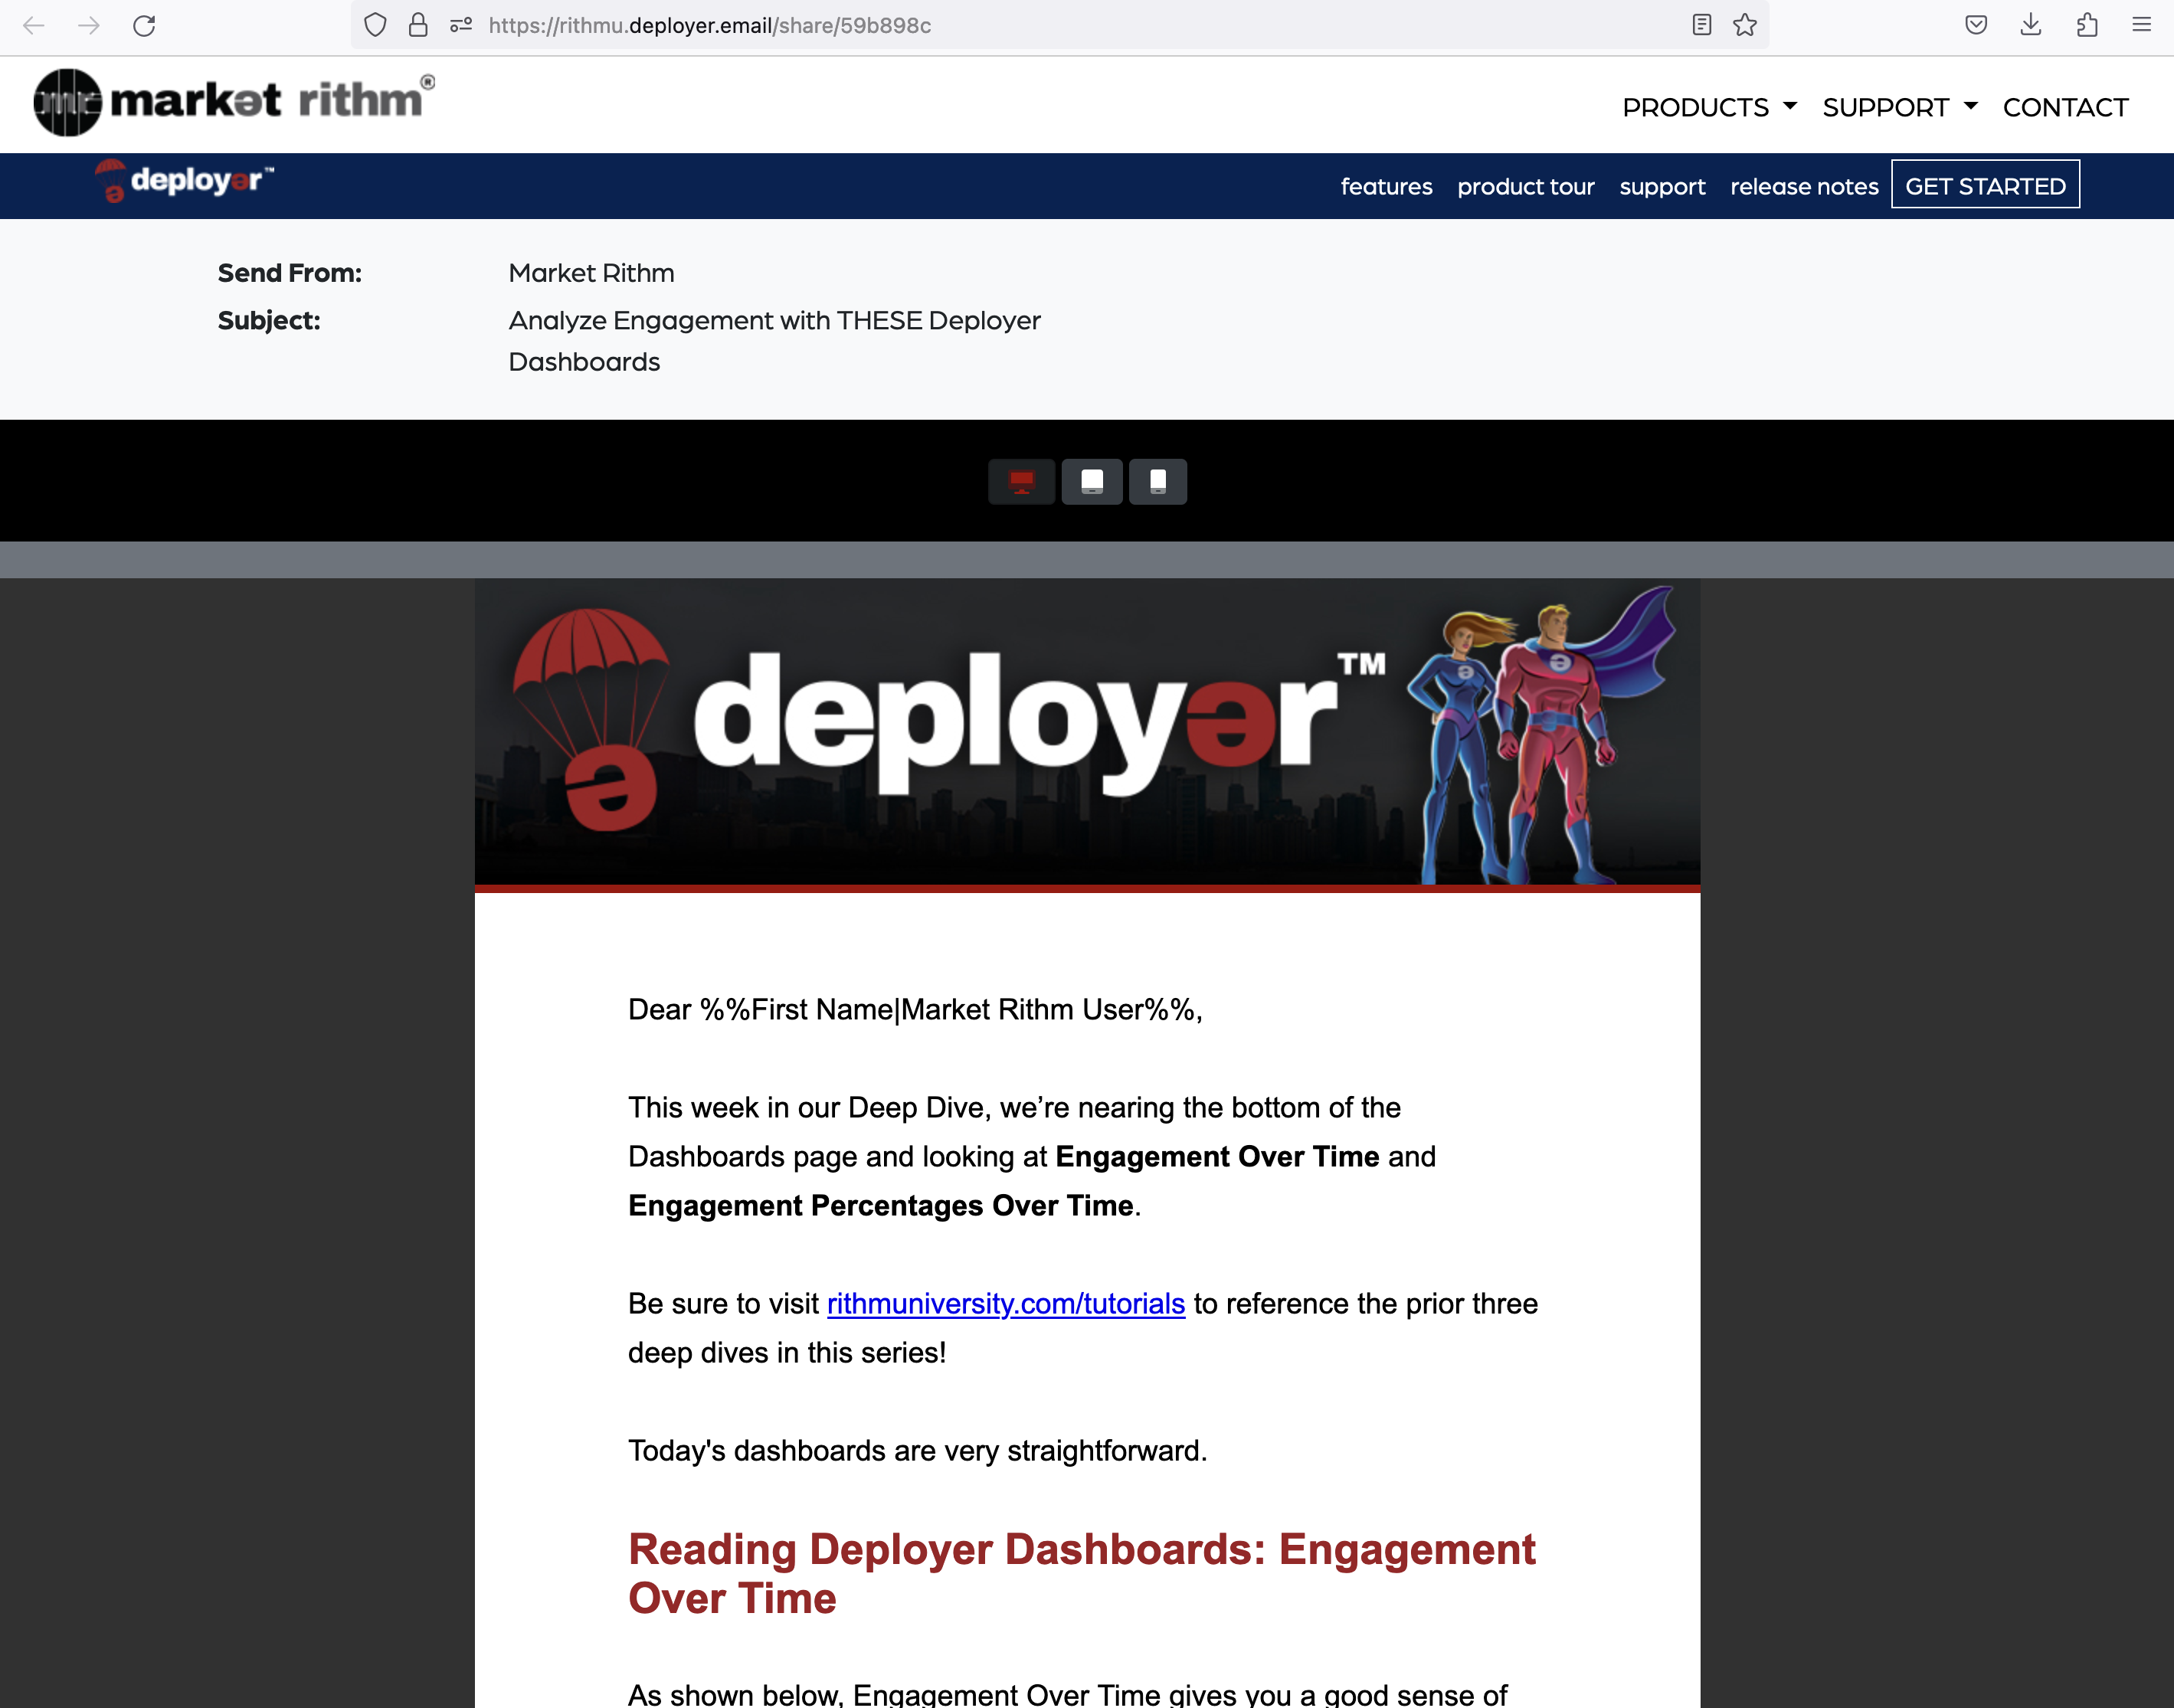
To share a scheduled or deployed campaign, click the share icon, and a new URL will appear.
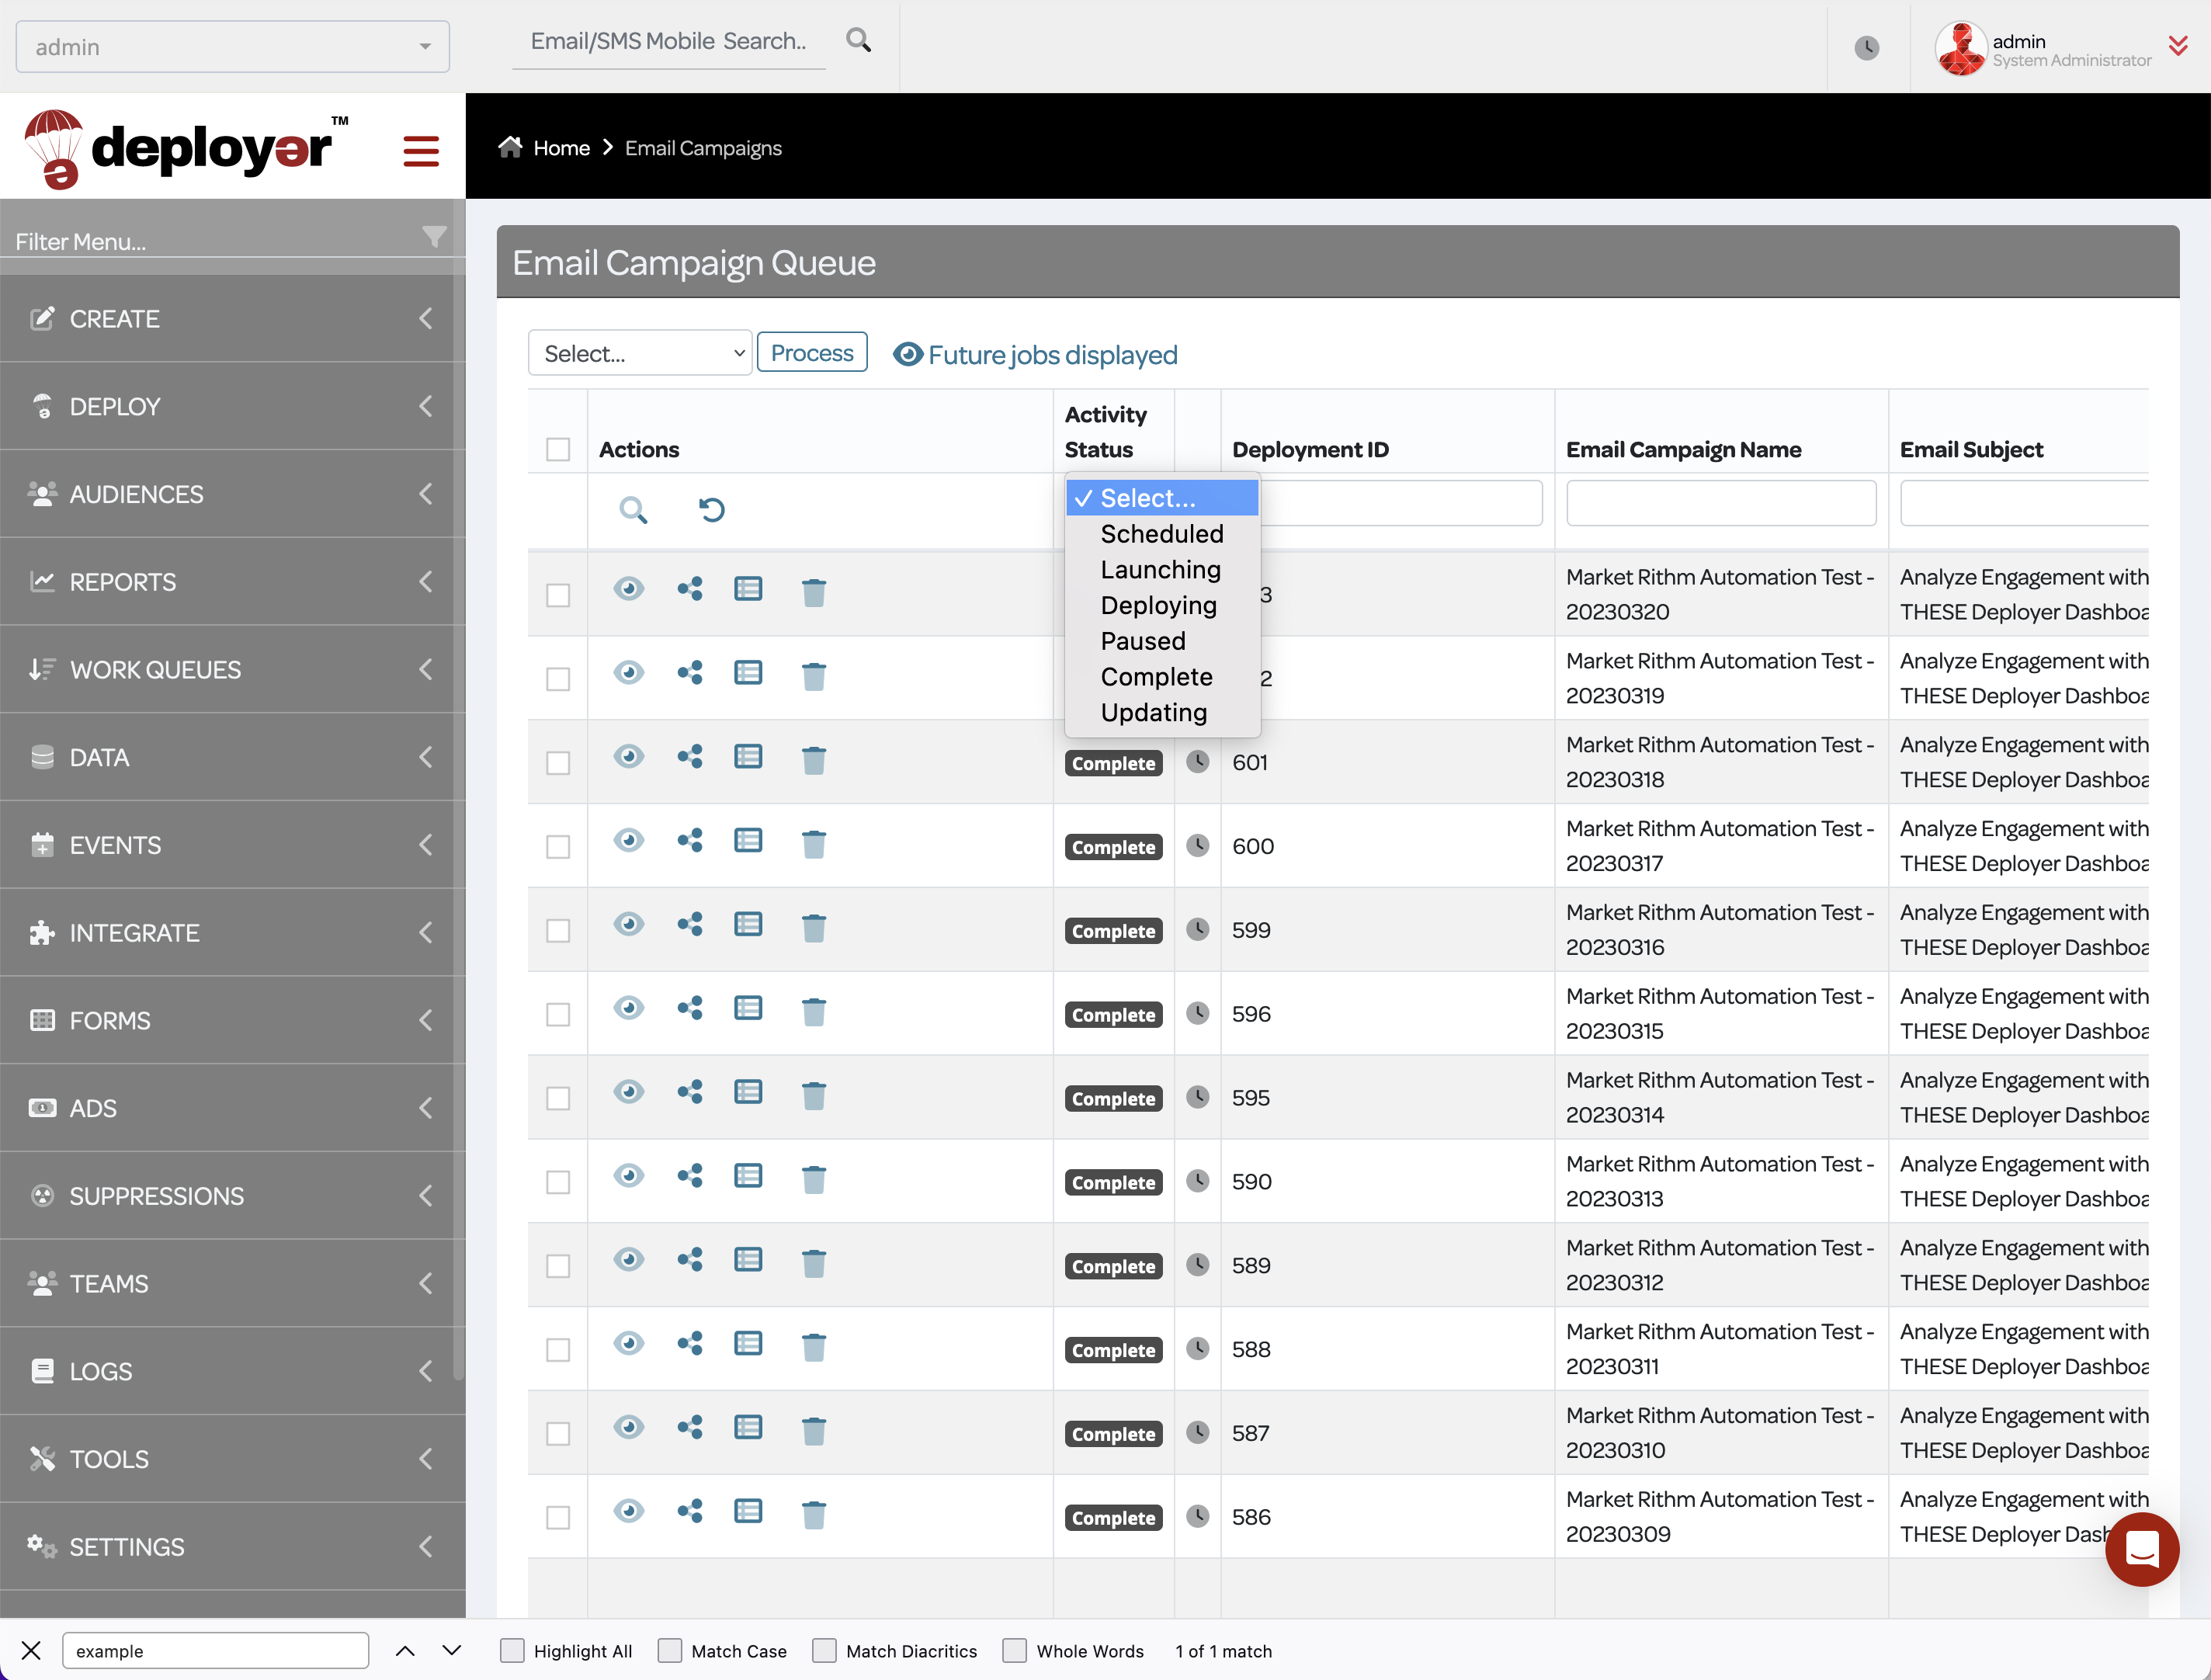
The “Activity Status” column provides a “select…” box that allows users to view all email campaigns of a particular status. The statuses are: Scheduled, Launching, Deploying, Paused, Complete, and Updating. A campaign that is launching has not sent any emails. It is Deployer preparing to send your campaign. If you made a mistake and need to pause or cancel your email, now is the time to do it. Once deploying commences, emails are being sent. Crashed status indicates that Deployer will restart and try again. If the job does not restart, then you need to put in a support ticket, chat or call us.
Conclusion: By using the Campaign Queue feature in Deployer, users can easily keep track of completed and scheduled email campaigns.
Accessing Campaign Queues: To access the Campaign Queues page, navigate to the left-hand menu in Deployer, go to Work Queues, and click on Campaign Queue. If you have trouble finding it, type Campaign Queue in the smart menu filter.

Campaign Queue Interface: The Campaign Queue page displays all past, present, or future campaigns scheduled in Deployer. Each row represents a segment that a campaign was, is, or will be deployed to.

The “Email Campaign Queue” header displays a select box prompting users to select a command. To execute the selected command, click the blue process box. The eye icon allows users to view future scheduled jobs in the columns table. To hide future jobs, click the blue eye icon. You may want to do this if there is an abundance of scheduled emails and you only want to see current and past campaigns.

Pausing or Deleting Scheduled Campaigns: To pause one or more campaigns, check the boxes in the rows of the scheduled campaign. Return to the command box and select the Pause Selected or Delete Selected command then click process. Alternatively, click the pause or delete icon in each row.

Filtering Campaign Queues: The magnifying glass icon allows users to filter a particular campaign by typing in an identifier like a keyword or ID number in its corresponding category column. To revert back to the default status where all emails can be seen starting from the most recent, click the revert arrow icon.

You can also filter campaigns by Deployment ID, Campaign Name, Subject Line, From Name, Campaign Code, or Audience segment.


To share a scheduled or deployed campaign, click the share icon, and a new URL will appear.

The “Activity Status” column provides a “select…” box that allows users to view all email campaigns of a particular status. The statuses are: Scheduled, Launching, Deploying, Paused, Complete, and Updating. A campaign that is launching has not sent any emails. It is Deployer preparing to send your campaign. If you made a mistake and need to pause or cancel your email, now is the time to do it. Once deploying commences, emails are being sent. Crashed status indicates that Deployer will restart and try again. If the job does not restart, then you need to put in a support ticket, chat or call us.

Conclusion: By using the Campaign Queue feature in Deployer, users can easily keep track of completed and scheduled email campaigns.


