Why this update matters: Over the last couple of years, we’ve been migrating Deployer from a managed service to a platform. At the same time, we’ve been working hard to make deliverability the best in the marketplace– but that requires a lot of data work, a lot of segmentation, and layers of algorithms for mail cadence, etc. In other words, sophistication means complexity.
Of course, we don’t want the complexity on the front end, in the user interface. Our goal is to make the app more and more simple while maintaining the highest deliverability possible for clients.
Our end goal is for you to be able to log in and build an extremely sophisticated campaign with just a few clicks of a button.
In this tutorial, you will learn how to create a campaign, from start to finish, using Mail Classes.
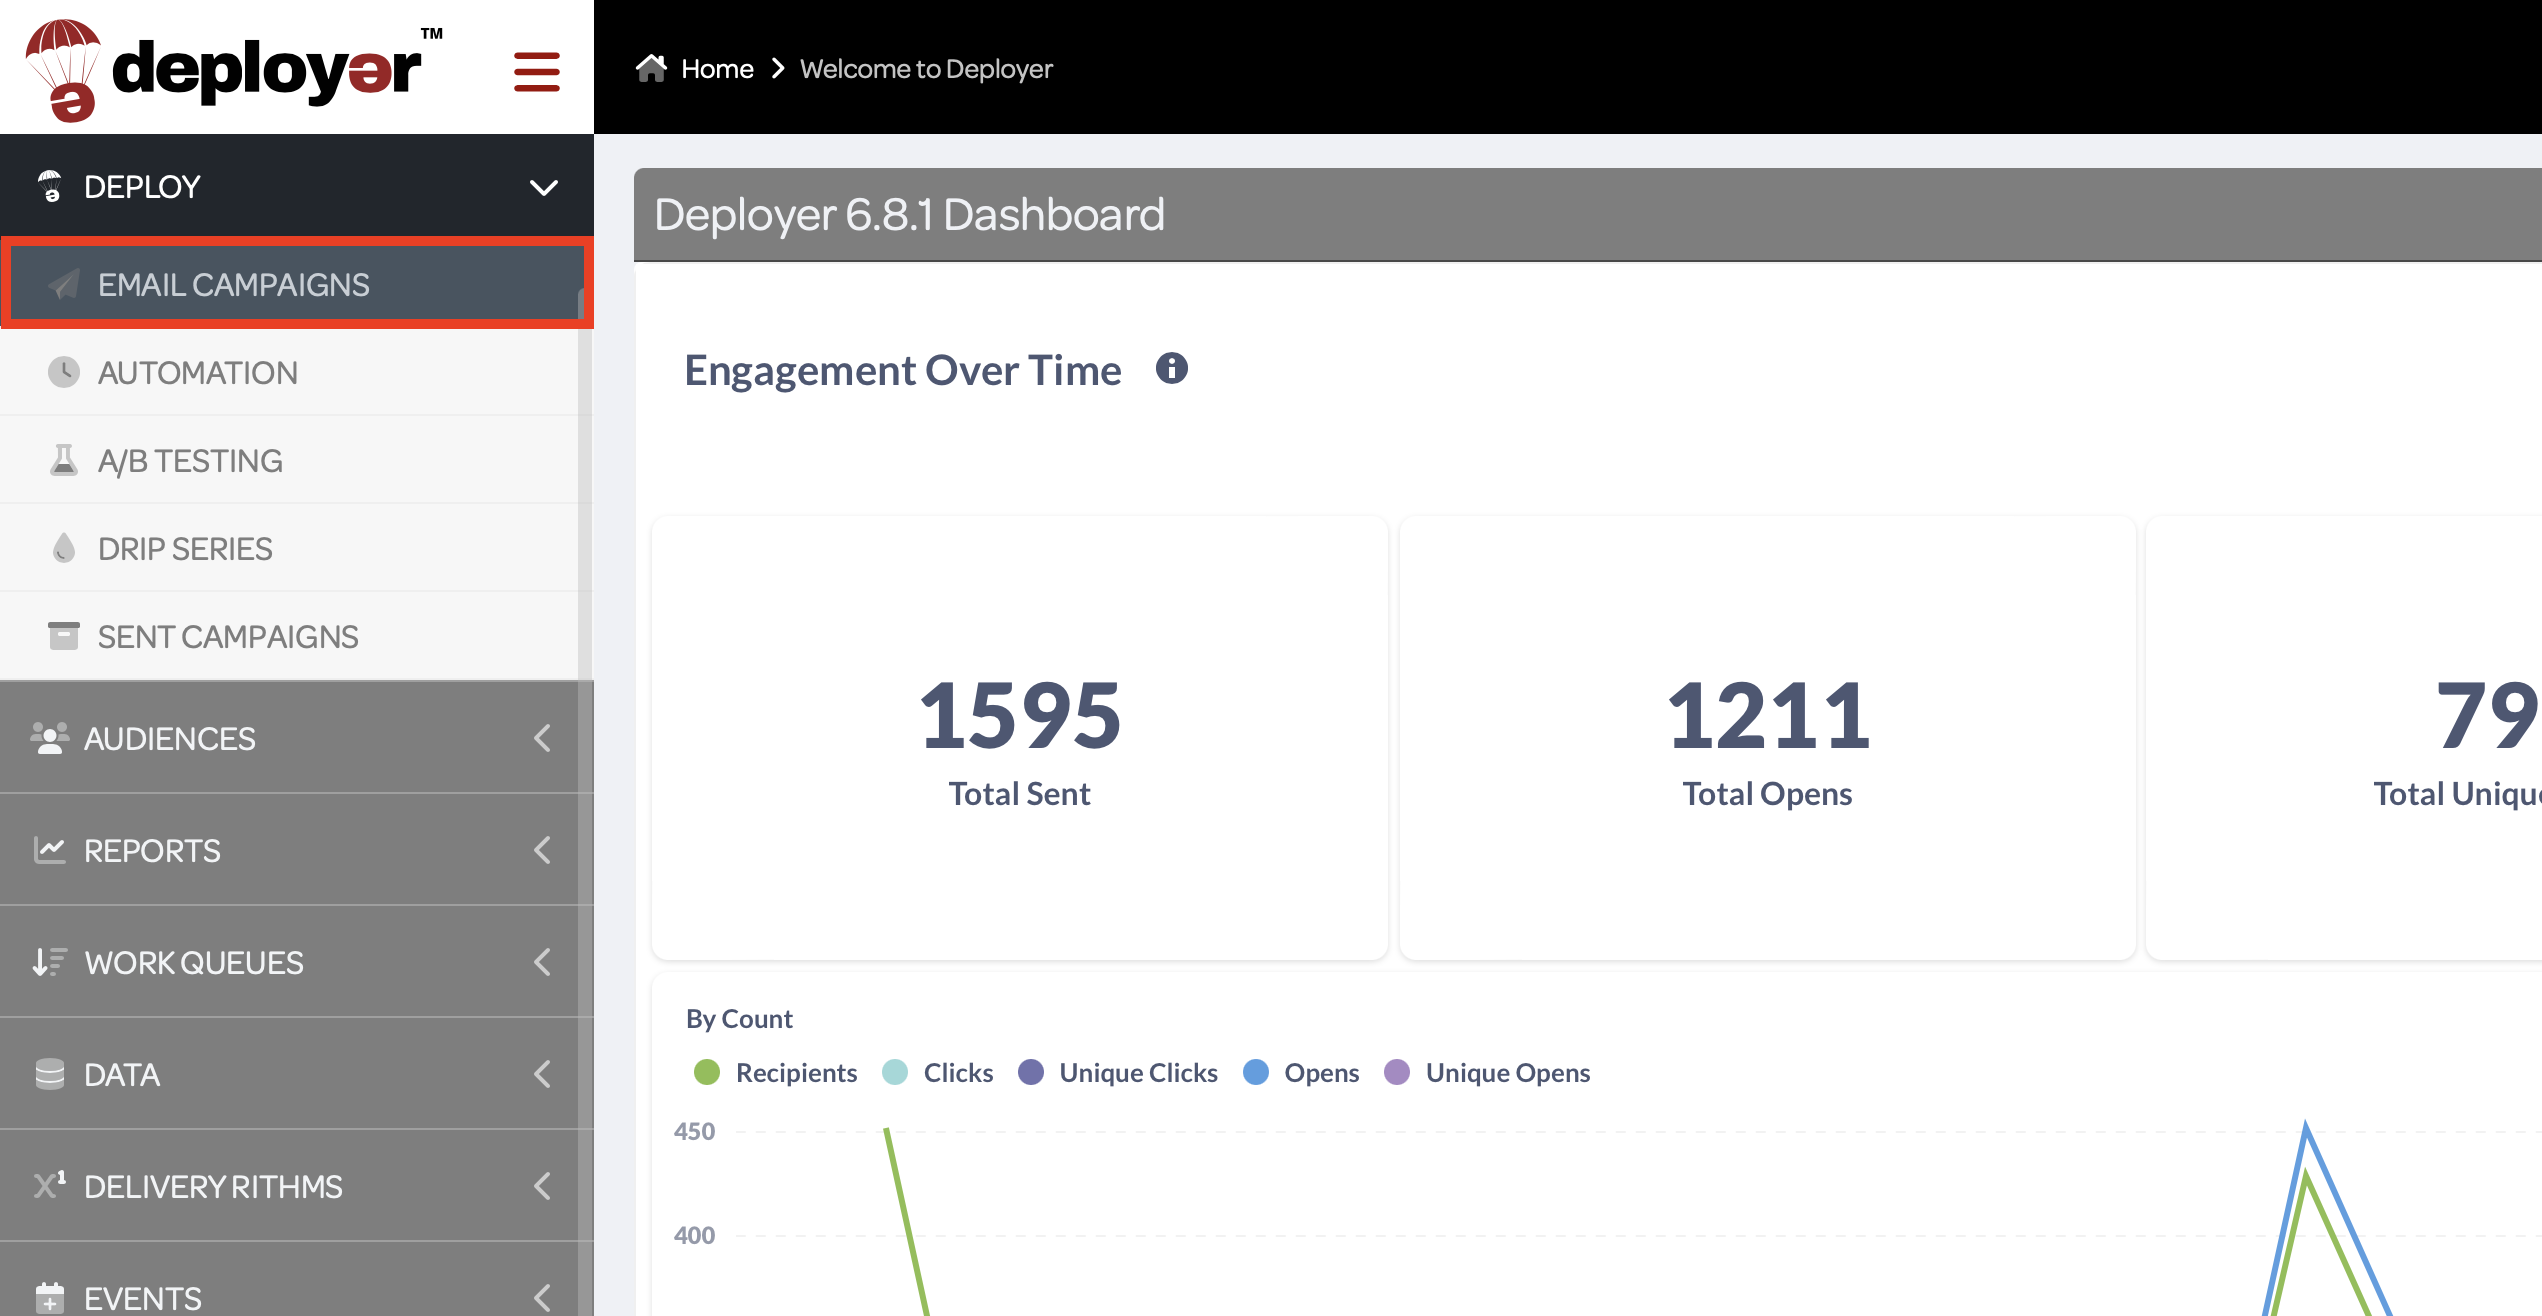
Step 1: In the left-hand menu, select Deploy to open the drop-down menu. You can create a new campaign within Email Campaigns, Automation, A/B Testing, or Drip Series. Since a regular Email Campaign is most common, that’s what we’ll create today.
Image

*Note: there are two new columns here, Audiences and Mail Classes. With this change, you can filter sends using the search bars above either, and easily compare what type of mail went to what audience.

The Audience is who you’re mailing to.
The Mail Class is the type of mail you’re delivering.
Step 2: Towards the right top corner, select New email campaign.

Step 3:
Select a Team– this is who has access to the campaign.
Create a Title for the campaign– should be clear and informative.
Enter the URL of the email from Structure that you would like to deploy

Step 4: Select Profile Deployment Setting
This is where you will select your Default Domain Profile.

Step 5: Input Envelope Details
Input a From Name; for example, “Bob from Bob’s Burgers” or “Jim Gaffigan, CPA.”
Input the front end of the From and Reply Email addresses. Note, the email ending will be auto-populated based on the Default Domain Profile you selected in Step 4.

Step 6: Select one or more Audiences
Choose which Audience(s) this campaign will mail to. Each Audience contains a particular delivery Rithm (segments tied to a cadence of algorithms) based on the type of mail it will receive. Therefore, each Audience also has different Mail Classes associated with it which will populate as options.

Step 7: Select a Mail Class.
Remember, the Audience is who you’re sending to; the Mail Class is what you’re sending.
*Note: If sending to more than one Audience, only the Mail Classes held in common by the selected Audiences will populate for use.
Types of Mail Classes include:

Step 8: Select Test Segments
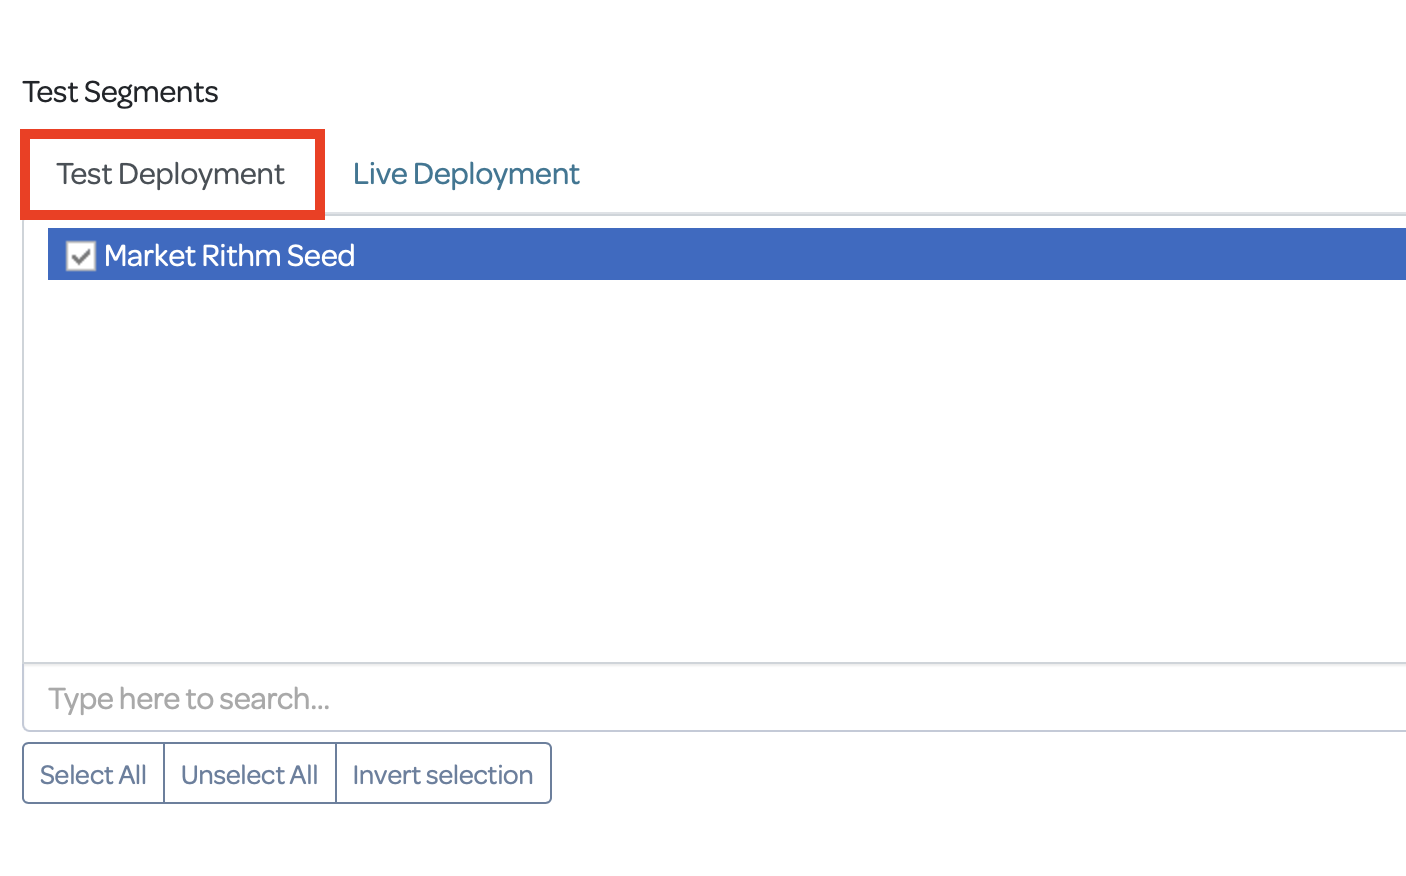
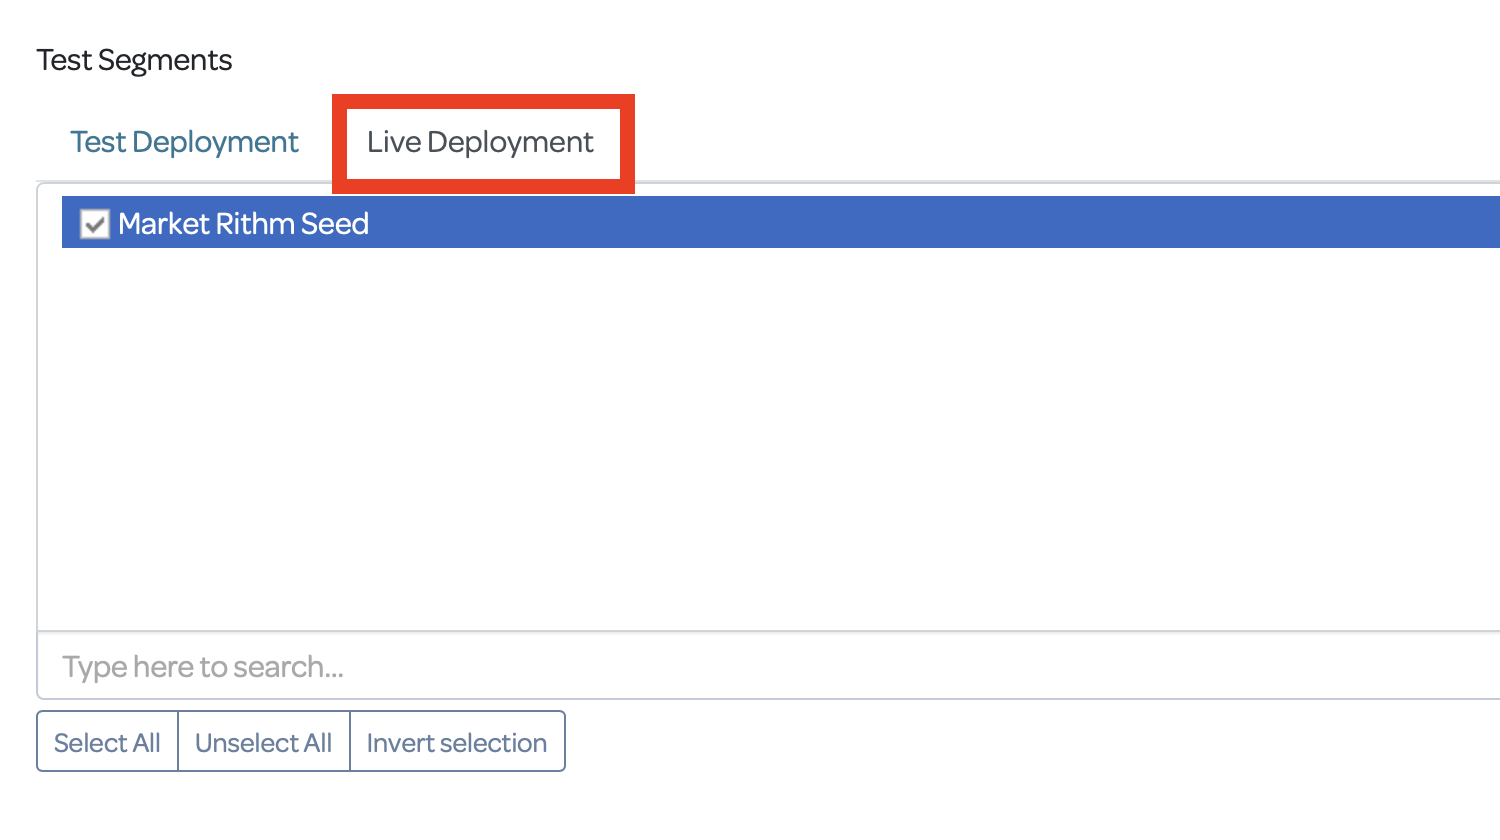
This is another new feature of Deployer 6.8: Test Segments now appear under Test Deployment and Live Deployment. In the left column, select which segments you would like to receive the Test Deployment of the campaign, then in the right column select the segments you would like to receive the Live Deployment.
This distinction is useful, for example, in campaigns where only a handful of your team are tasked with reviewing tests, but you want everyone on your team to receive the live email.


Step 9: Suppression Settings
If there is any list, segment, audience, or ad hoc suppression file that you want to be suppressed from receiving the campaign, select them here.
Step 10: API Settings
Adjust API settings if you're going to send data outside of Deployer from this particular campaign. Ex.) postback or webhook.
Step 11: Subscription Management
Subscription Management may be used if you have multiple publications and varying subscription preference levels.
FINAL STEP: Hit the "Create" button at the button! Congratulations, you've built an Email Campaign using the new features in Deployer 6.8.
Of course, we don’t want the complexity on the front end, in the user interface. Our goal is to make the app more and more simple while maintaining the highest deliverability possible for clients.
Our end goal is for you to be able to log in and build an extremely sophisticated campaign with just a few clicks of a button.
That’s where Mail Classes come in, the premier feature of Deployer 6.8.
In this tutorial, you will learn how to create a campaign, from start to finish, using Mail Classes.
Step 1: In the left-hand menu, select Deploy to open the drop-down menu. You can create a new campaign within Email Campaigns, Automation, A/B Testing, or Drip Series. Since a regular Email Campaign is most common, that’s what we’ll create today.
Image

*Note: there are two new columns here, Audiences and Mail Classes. With this change, you can filter sends using the search bars above either, and easily compare what type of mail went to what audience.

The Audience is who you’re mailing to.
The Mail Class is the type of mail you’re delivering.
Step 2: Towards the right top corner, select New email campaign.

Step 3:
Select a Team– this is who has access to the campaign.
Create a Title for the campaign– should be clear and informative.
Enter the URL of the email from Structure that you would like to deploy

Step 4: Select Profile Deployment Setting
This is where you will select your Default Domain Profile.

Step 5: Input Envelope Details
Input a From Name; for example, “Bob from Bob’s Burgers” or “Jim Gaffigan, CPA.”
Input the front end of the From and Reply Email addresses. Note, the email ending will be auto-populated based on the Default Domain Profile you selected in Step 4.

Step 6: Select one or more Audiences
Choose which Audience(s) this campaign will mail to. Each Audience contains a particular delivery Rithm (segments tied to a cadence of algorithms) based on the type of mail it will receive. Therefore, each Audience also has different Mail Classes associated with it which will populate as options.

Step 7: Select a Mail Class.
Remember, the Audience is who you’re sending to; the Mail Class is what you’re sending.
*Note: If sending to more than one Audience, only the Mail Classes held in common by the selected Audiences will populate for use.
For example, "Audience A" can be sent a Newsletter, Email Letter, or Marketing Mail while "Audience B" can be sent an Email Letter or Biweekly Newsletter. Both Audiences can be sent an Email Letter, so that is the Mail Class that can be selected for a Combined Audience send.
Types of Mail Classes include:
- Daily Newsletter: One of our most popular campaigns, sending 5 days a week.
- Bi-Weekly Newsletter: A newsletter deploying twice a week.
- Weekly Newsletter: A newsletter deploying once a week.
- Monthly Newsletter: A newsletter deploying once a month.
- Alert Email: An email containing an informative message from the sender (for example, new product line launched).
- Informational Mail: An email designed to simply relay information to your audience; updates and messages.
- Marketing Mail: Any email designed to produce a profit (ie., Donate to my Campaign, Buy my Book, Sign up Now).
- Sponsored Mail: Emails from a third party, sent through your brand/platform.
- Full Send: An email sent to your entire mailable record list.

Step 8: Select Test Segments
This is another new feature of Deployer 6.8: Test Segments now appear under Test Deployment and Live Deployment. In the left column, select which segments you would like to receive the Test Deployment of the campaign, then in the right column select the segments you would like to receive the Live Deployment.
This distinction is useful, for example, in campaigns where only a handful of your team are tasked with reviewing tests, but you want everyone on your team to receive the live email.


Step 9: Suppression Settings
If there is any list, segment, audience, or ad hoc suppression file that you want to be suppressed from receiving the campaign, select them here.
Step 10: API Settings
Adjust API settings if you're going to send data outside of Deployer from this particular campaign. Ex.) postback or webhook.
Step 11: Subscription Management
Subscription Management may be used if you have multiple publications and varying subscription preference levels.
FINAL STEP: Hit the "Create" button at the button! Congratulations, you've built an Email Campaign using the new features in Deployer 6.8.


